Exchange Server Backup, Restore, and Disaster Recovery
This is a chapter from an Exchange Server book which was never published. A few years ago several colleagues and I decided to write an Exchange Server 2016 book, but scheduling and bandwidth issues caused us to delay it until Exchange Server 2019. However, we soon realized we were simply too busy to commit the amount of time needed to properly see the book to its completion. As a result, I was left with a few chapters destined to die a slow death in a folder on my desktop. As an alternative to that grim scenario, I’ve decided to publish them here (with zero warranty or proper editing). Enjoy.
Also, if you enjoy the below topic on Exchange Backup, Restore, & DR, checkout the Exchange Server Troubleshooting Companion now available for free on TechNet
Having spent much of my career in a support role, working with the largest of the large to smallest of the small companies, one theme rang consistently true in all escalations involving disaster recovery; improper planning and testing. One tell-tale sign of an operationally mature IT department is their commitment to planning and testing for failures within their environment. What happens when the WAN link fails? Whom do we contact when our critical database goes down? Can we deliver adequate performance if multiple servers in our farm fail? Have we tested our site switchover capability? Do we have site switchover capability? We have a joke in support that whenever an IT Professional makes a critical mistake resulting in significant downtime it’s referred to as an RGE, or a “Resume Generating Event.” Having a firm understanding of Exchange, what it relies on to function, its built-in data retention/recovery features, and the various supported paths it provides for recovery can help you ensure your company or clients are well prepared for the worst Murphy’s Law can throw at you. This information, combined with a sound testing practice, are vital for all Exchange Professionals.
Golden Rule; never have a critical workload in production without an escalation path.
| Real World: While proper preparation, planning, and testing is vital, so are support contracts/agreements. Never have a critical workload in production that you do not have an escalation path for. Having an expert on staff is not synonymous with having an escalation path, as experts aren’t always available. |
What is important to backup for Exchange?
It would be easy to purchase a backup product said to be made for Exchange, kick off a backup, and tell yourself you have done the due diligence. If the product truly is as advertised, you might genuinely be adequately prepared for all manner of failure and recovery scenarios. Much like “script kiddies” are ridiculed by the hacking community for actually understanding what they’re working with, running wizards and hoping for success is not helpful when you encounter an issue. This is why understanding what is actually being backed up and how it relates to Exchange is so important.
Below are the relevant items you should be backing up on an Exchange server
- Mailbox Databases
- Public Folder Databases (if running Exchange 2010)
- Installed Certificates
- IIS/Web.Config file customizations
- Voicemail directory (if utilizing Unified Messaging)
- Any third-party tools
Mailbox and Public Folder Databases are by far the most important of any of these items, as they hold the contents of all mailbox and Public Folder data. The methods used to capture, store, and potentially restore this data is where you will find the differentiation between backup solution vendors. Later in this module, I will discuss the best means of backing up Exchange databases, but it’s well understood that the most important piece of your Exchange deployment is the data held within these files. The below files make up an Exchange database:
- Database file (.edb)
- Transaction Logs (.log)
- Checkpoint File (.chk)
- System/Reservation files (.jrs)
Most people will only concern themselves with the above files, since they can be easily gathered via a backup program. However, it is important to have an exported copy of all added SSL certificates used for Exchange, including the Private Keys. I do not mean the self-signed certificates added by the Exchange installer, but any certificated added by an Administrator. While it’s true many of these can be re-requested, doing so can take valuable time. It is also discouraged to rely on the response time of third-party Certificate Authority if you’re in the middle of an Exchange outage. Keep the certificate in a safe location that is easily accessible.
| Real World: Be sure to include the private key when exporting the certificate, as it is useless to Exchange otherwise. This action will require a password be used for security purposes. Be sure the password is properly documented and protected so authorized co-workers can access it in an emergency. |
Should the environment be utilizing any IIS customizations such as custom OWA login pages, modified web.config files, be sure to take note of these and backup those changes/settings/files in a secure location. Some companies choose to implement IIS-based redirection to simplify the OWA URL (removing the requirement specify the /owa path for instance). These configurations should be properly documented so they can be easily re-implemented after an Exchange server recovery. This ensures the end user experience remains consistent.
Lastly, any third-party plug-ins, add-ins, extensions, or applications should either be backed up (if they include their own database such as SQL for storing configuration information) or included in the disaster recovery plans. Whether it be an IIS extension, Transport Agent, Anti-SPAM, Anti-Virus, or email archiving program, ensuring you are well-equipped to reinstall and reconfigure properly (in a possibly sleep-deprived state working an Exchange disaster recovery all-nighter) will drastically reduce the time of your outage.
Traditional Backup options
A “Traditional Backup” in this context, is any backup methodology reliant upon copying Exchange database information and later restoring it. I intentionally speak in generic terms because there are many ways of achieving this goal. You could use Windows Server Backup to take a VSS Full backup of local Exchange database files in a single server environment. You could use a centralized backup server with an agent installed on each Exchange server to take a VSS Differential backup, copying the data across the network to a centralized storage repository. You could use a virtualization-based backup program at the hypervisor host level (having VSS tools integrated within the virtual machine) to backup a virtual machine. You could even use the very low-tech method of dismounting the database and manually copying the databases files (the database must be dismounted for the backup to be in a consistent state, as this method is not using the VSS subsystem). The last method is usually a last ditch effort to get a copy of the database files, typically done when the backup solution isn’t working properly.
With each option the goal is the same, get a consistent/non-corrupted copy of the database which can be placed into a “Clean Shutdown” state and mounted for recovery purposes. When discussing types of traditional backups, the differentiators typically relate to the handling of transaction logs. Are they truncated or left in-place? Below are the common backup types:
- Normal (or Full) – Backs up Exchange data store in its entirety. Results in transaction log truncation
- Copy – Backs up same data set as Full except no marking takes place to give Incremental/Differential backups context. Does not result in transaction log truncation. Typically done as an out of routine backup operation.
- Incremental – Backs up data set that has changed since a Full or Incremental backup. Results in transaction log truncation. A restore would require each Incremental backup since the most recent Full backup, as well as the Full backup.
- Differential – Backs up data set that has changed since the last Full backup. A restore would require one Full and one Differential backup. Does not result in transaction log truncation.
| Note: Exchange 2013 supports only Exchange-aware, VSS-based backups. Exchange 2013 includes a plug-in for Windows Server Backup that enables you to make and restore VSS-based backups of Exchange data. To back up and restore Exchange 2013, you must use an Exchange-aware application that supports the VSS writer for Exchange 2013, such as Windows Server Backup (with the VSS plug-in), Microsoft System Center 2012 – Data Protection Manager, or a third-party Exchange-aware VSS-based application. Reference |
Regardless of which backup type or application used, it must be “Exchange-Aware” and utilize the Microsoft Volume Shadow Copy Service (VSS). In simplistic terms, VSS ensures that active workloads may be backed up in a consistent and stable manner, without requiring downtime. It does this by providing a framework of the following components:
- VSS Service within Windows
- Requestor: Backup Application
- Writer: An applications VSS component
- Provider: Holds backup data within software or hardware

Ultimately, this means that not only must your backup application support VSS (which almost all do), it must also be “Exchange-Aware” in that it is able to communicate with the Exchange Information store to quiesce IO, create a VSS snapshot, resume IO, and request that the Information Store truncate the required transaction logs.
Transaction Logging and Recovery
| Note: The following section covering “Transaction Logging and Recovery” can also be found in the Exchange Server Troubleshooting Companion. Within that narrative, it is used to aid in troubleshooting. Within this context, it serves to educate the reader as to what happens within the ESE database during normal operations, backup/restore scenarios, as well as troubleshooting. |
To fully comprehend log truncation during normal operations and backup/restore scenarios, a fundamental knowledge of Exchange database transaction logging is required. This will also help the reader in understanding Database Availability Group log shipping and truncation.
Regardless of which Exchange client is used, after connecting through the various Exchange services and worker processes, a user ultimately accesses their mailbox via the Information Store process. The Exchange Information Store (formerly the Store.exe process, but with Exchange 2013 onward, Microsoft.Exchange.Store.Worker.exe) is where the Exchange Database Cache exists. A separate worker process runs for every database on a server. The cache holds all currently active Exchange database transactions in memory, such as new mail, deletions, modifications, etc. This cache can become quite large but this is by design as keeping transactions in memory is much faster than fetching and updating database pages from disk. When the cache does read/write to the database (.edb), it does so in 32 KB pages.
| Note: One of the biggest contributors to the IOPS reductions between Exchange 2003 and Exchange 2010 was the increase in database page size. Page size was 4 KB in Exchange 2003, 8 KB in 2007, and 32 KB in 2010 onwards. A larger page size translates to fewer requests to disk, as more data can be read/written per IO, but requires more RAM. |
It’s important to understand that clients connect to the cache, not the actual .edb file. No client ever directly accesses the database (.edb) or any log files (.log). Instead, all connections occur in memory to the database cache. Of course, if the database (.edb) file becomes locked due to another process (such as anti-virus or backup programs), the Information Service will eventually be unable to communicate with it and the database will eventually dismount.
When discussing backups, transaction logs are extremely important, so it’s vital to understand which role they play in database transactions. As transactions occur in the cache, they create a series of transaction records or log data, which fills a log buffer. Once a log buffer is full (1 MB), it is flushed to disk to create a 1 MB transaction log file. This process repeats as more transactions occur in cache and the log buffer fills and is written to disk. The currently active transaction log file is always E0n.log, where n represents the number of the log stream for that database.
| Note: The first database on a server will be E00.log, the second will be E01.log and so on. Once the current log file is committed to disk, it is renamed to a value such as E0000000001.log, E0000000002.log and so on. These log files are in Hexadecimal, so as an example, E0000000009.log would be followed by E000000000A.log. |
As transaction log files are written to disk, the transactions in cache might yet still not be committed to the actual database (.edb) file. This process is referred to as “write-ahead logging” (In fact, technically the transactions are written to the logs before the user sees the change). This is because writes to the database are random IO while creating a transaction log is a sequential IO. Since the data being written to the database could be located anywhere in a very large .edb file, the operation on disk is usually random. On the other hand, creating a 1 MB transaction log takes a single new sequential write operation to disk. With rotational media, this distinction becomes important as Seek Time contributes to disk latency. Sequential IO is very low impact on a disk subsystem while random IO is more burdensome. Writing the transactions sequentially to logs instead of the database (.edb) file allows the transactions to be captured efficiently (in cache and on disk in the transaction log) while also reducing random IOPS. The focus on trading random IO for sequential IO by using memory has contributed to the gradual reduction in the product’s IO requirement since Exchange 2007.
When are the transactions written to the database (.edb) file? After a predetermined amount of transaction logs are generated, the transactions in cache are flushed to the database (.edb) file. The predetermined amount is called the Checkpoint Depth Target and is tracked by the Checkpoint File (.chk). The Checkpoint File monitors the logs with the oldest outstanding uncommitted page. Databases which have no replicas/copies have a Checkpoint Depth Target of 20 transaction logs whereas databases with passive copies (DAG) have a target of 100 transaction logs. This fact will become relevant when I discuss log truncation, especially in a DAG.
Of course, there is another reason that Exchange writes transactions to the log files before being committed to the database (.edb) file. By quickly committing transactions to disk (via transaction logs), it means that the transactions exist in two locations; memory and disk. If a failure occurs that causes the Information Store to terminate unexpectedly, the most recent transactions are still available and can be replayed into the database from the transaction logs after the database is mounted and to bring the database up-to-date.
For a long time, it was recommended to place your Exchange database file (.edb) onto different spindles than your transaction logs. This is still the recommendation when only one copy of a database exists (non-DAG protected). In fact, this is not for performance reasons but to assist recovery in the event of a storage failure. Say you lost your database drive, leaving you only with the transaction logs. Technically, if you still had every transaction log present since the database was first created, you could use ESEUTIL to generate a new database and commit every transaction from the logs into it. However, this is not usually the case. People usually resort to an Exchange-Aware backup, which leads us to why an Exchange-Aware backup truncates log files. When a Full Exchange-Aware backup is performed against a database, the .edb file is copied to the backup location, as well as any transaction logs present for the database. With these files, the database can be restored and the database can be brought into a Clean Shutdown state, meaning all transactions in the logs have been committed to the .edb file and the database can be mounted. As the backup completes, it sends a command to the ESE database engine stating that any transaction logs older than a certain point can be truncated (deleted). These logs are no longer required on the Exchange server because we now possess a copy of them in the backup set.
| Note: Technically, once a transaction log has been written to disk, it is no longer needed. When the time comes to commit transactions to the database (.edb) file, this action occurs from cache to the .edb file, not from the transaction logs to the .edb file. However, you should not manually delete transaction logs as these are vital for recovery purposes. |
Back to our scenario where the .edb file was lost due to a storage failure. We would simply restore the database and transaction logs from our Exchange-Aware backup, and replay both the restored and whatever logs are available into the .edb file. If a complete set of logs are available, the result should be that Exchange could replay a continuous stream of transaction logs from the point where the backup was created to the time when the failure occurred and result in no data loss.
This brings me to the question: “Why can’t I use Circular Logging to delete my transaction logs automatically so they don’t fill up my drive?” First, we need to understand that Circular Logging is a property on a database. When circular logging enabled, the Information Store deletes transaction log files as soon as the transactions contained within them have been committed from cache to the .edb file. A much smaller set of logs is maintained, as the set never grows over time because logs are continuously deleted.
The command to enable circular logging is as follows:
[PS] C:\> Set-MailboxDatabase –Identity <DatabaseFileName> -CircularLoggingEnabled $True
The question then comes into play as to why not enable circular logging for every database? Having read the chapter up to this point, the answer should be obvious. If your database subsequently becomes unusable due to a failure, no transaction logs will be available for replay into the database, as all but the most recent logs will have been automatically deleted by Exchange. Since all transaction logs must be replayed into the database in their proper sequence, your only choice would be to restore the most recent database backup, and lose all Exchange transactions that occurred between the time of the backup and the time of failure.
It is at this point that I should define the differences between traditional (JET) Circular Logging and Continuous Replication Circular Logging (CRCL). What I described above is JET Circular Logging and is used on standalone Exchange Servers, or databases on Exchange Servers which do not have replicated copies. CRCL is used when a database has replicated copies in a DAG and is enabled using the same command. When using traditional backup methods, neither should be enabled as the backup program’s consistency check will fail due to missing logs.
| Note: After executing this command, the database must be dismounted and remounted before the change takes effect. Once enabled, any transaction logs that have been committed to the database will be automatically removed. So if there were 50k transaction logs present, they would be automatically deleted. |
In my opinion, JET Circular Logging should only ever be enabled in a lab or when you are in dire need of disk space during a recovery or during transaction-intense operations such as moving mailboxes. This is because if you encounter a failure and lose the database, you will lose all transactions that occurred between the last backup and the failure. CRCL should only be enabled in a DAG environment where Exchange Native Data Protection is being used, as traditional backups are not performed. In this configuration, since backups are not performed, no transaction logs will ever be truncated and database drives would ultimately reach capacity.
The logic used to determine when logs will be truncated is as follows (for more information, see this reference):
For truncation to occur on highly available (non-lagged) mailbox database copies, the answer must be “Yes” to the following questions:
- Has the log file been backed up, or is CRCL enabled?
- Is the log file below the checkpoint?
- Do the other non-lagged copies of the database agree with deletion?
- Has the log file been inspected by all lagged copies of the database?
For truncation to occur on lagged database copies, the answer must be “Yes” to the following questions:
- Is the log file below the checkpoint?
- Is the log file older than ReplayLagTime + TruncationLagTime?
- Is the log file deleted on the active copy of the database?
Simply put, the DAG ensures a transaction log has been inspected by all database copies in the DAG before it can be deleted. The log file must also be below the Checkpoint Depth Target, which is 100 transaction logs in DAG-protected databases. Knowing this target is important for understanding expected behavior when verifying transaction log truncation after a successful Exchange-Aware backup. On a standalone database there will always be ~20 transaction logs and on a DAG-protected database there will always be ~100 transaction logs, even after a successful Exchange-Aware backup. This is because only logs that have reached the Checkpoint Depth Target are eligible for truncation. On several occasions I’ve been asked why transaction logs within a DAG were not truncating after a successful backup because there always seemed to be transaction logs in the log directory. The short answer is there will always ~100 logs in these directories. If you want to verify successful log truncation following a backup in a DAG, I recommend the following article. Similarly, in lab environments truncation may not occur because the database is new and has yet to generate 100 transaction logs, so there is nothing to truncate.
| Note: While CRCL is enabled on a DAG-protected database, additional copies cannot be added. CRCL must be disabled, and the database must be dismounted/remounted before additional copies can be added. |
Understanding the inner workings of Exchange databases helps to determine why a backup might not be successful and the steps needed to remedy it. As mentioned above, utilizing traditional backups in a DAG present their own unique challenges; namely, transaction logs not truncating due to replication issues between nodes.
Traditional backup considerations
The most important phase of planning a backup solution should be defining your availability and data retention requirements. Much of this was covered in the High Availability chapter. Namely, how long can you be down and how much data can you afford to lose? This is commonly defined as Recovery Time Objective (RTO) and Recovery Point Objective (RPO). Relative to Exchange, we are speaking of how long users are unable to access the email system and how much data can the business afford to lose to remain within acceptable measures.
While most Exchange High Availability planning discussions centre around the Preferred Architecture, your backup solution design can have a significant impact to your overall sizing and design. For instance, Microsoft recommends database sizes no greater than 200 GB for standalone (non-DAG) and no greater than 2 TB for highly available databases (DAG). I feel it’s important to understand the reasoning behind these numbers, and many customers either follow the recommendation blindly or ignore it while not understanding the logic behind it. Making that mistake can drastically affect the availability of your solution. The 200 GB recommendation for standalone servers (which will be using traditional backup methods) is to ensure the backups are able to complete in a reasonable amount of time and capable of being restored in a reasonable amount of time. I’ve seen far too many customers with databases sometimes over 1 TB in size that have issues with their backup jobs taking forever to complete. However, the most serious scenarios involve the extended outages resulting from restoring such a large backup set in a reasonable amount of time. It’s less common for multiple databases to become lost/corrupted (assuming they’re wisely placed on differing storage from one another) therefore it makes more sense to have multiple smaller databases than fewer larger databases. Should a database be lost/corrupted, fewer users are affected and for less time, as the smaller database is more quickly restored from traditional backup. While the 200 GB recommendation for standalone servers is dictated by backup/restore times, the 2 TB recommendation for DAG-protected databases is related to re-seed times. If an active database copy fails in a DAG, a passive copy will be brought online within seconds. Therefore, even when utilizing traditional backups in a DAG, the restore time of a database is negligible. Having a database no greater than 2 TB allows the seeding/reseeding operation to complete within an operationally reasonable amount of time. If seeding occurs at 20 MB/sec then a 2TB database would take 23 hours to reseed while an 8TB database would take almost 4 days. All this time, your availability has been reduced as one of your passive copies is unavailable until seeding completes.
Here we have two examples of how your backup requirements could potentially dictate an important core design change (database size, mailbox layout, and general performance load). Whether you implement a standalone server or a DAG utilizing traditional backups, database size plays an important part to the design and operation of the solution. Equally important is database file location, and whether database (.edb) and log (.log) files should be isolated from one another on different physical spindles. The answer is quite simple; if on a standalone server, the .edb and .log files should be on separate spindles (truly separate spindles, not separate volumes/partitions on the same RAID array/LUN) and if using a DAG they can reside on the same set of spindles. I like to explain to customers that you should never allow the failure if a single disk bring down a database, so be aware of your failure domains when placing your database files. When discussing RAID during design discussions, many will hear Microsoft discussing JBOD storage options for Exchange and forget it is only supported when utilizing a DAG and the database has three highly available (not-lagged) copies. If you have a standalone server, or a DAG deployment where your database has less than threw highly available copies, then you must still use RAID (or your underlying SAN/intelligent storage solution) for protection.
| Real World: Due to the heavy write penalty of RAID 5 (4; Read Data/Read Parity/Write Data/Write Parity) and RAID 6 (6) and considering Exchange is a write-intensive application, use of RAID 5 and 6 are discouraged for Exchange database storage. Instead, Microsoft recommends RAID 0 or 10 which each only have a write penalty of 2. Of course, utilizing JBOD (which in practice is really just using separate RAID 0 arrays for each hard disk) incurs no write penalty and is the best performing. Reference |
The selection of your backup solution itself and the questions you must ask. As mentioned, the backup application must be “Exchange-Aware” and fully capable of interacting with the VSS and ESE subsystems. This ensures the data is consistent and the transaction logs are properly truncated upon completion. Performing a “flat-file” backup, or simply copying the database as if it were a simplistic file on the server, will not only result in a database file you may not be able to restore from, but also a server that will likely run out of disk space as no log truncation will occur.
Lastly, it should go without saying but an untested backup an untrusted backup. I recommend regularly monitoring and restoring a backup set to an alternate location then mounting it in a Recovery Database to verify the database files can in fact be mounted. Practicing and documenting this process will make your team/customer more capable of satisfying recovery Service Level Agreements (SLAs) as well as ensure there are no flaws in the backup software itself.
Exchange Native Data Protection
Ten years ago, the idea of not performing traditional backups of an Exchange server was absurd to everyone but the Microsoft Exchange think tank in Redmond Washington. However, Office 365 as we know it would not be possible without Exchange Native Data Protection. At one time in my career, I worked for a hosted email archiving company, and it was there I learned the struggle of implementing a traditional backup solution in such an environment. Imagine customers who require email on hold be available, redundant, and easily accessible. Imagine those same customers who also require email to immediately be purged and not recoverable once it has fallen out of hold; usually because of a legal matter that has ended and they wish for the email to no longer be discoverable. Using traditional backup methodologies, how would you accomplish keeping copies of backed up data while simultaneously ensuring all remnants of a particular mail item were purged in an automated fashion? A script that touches every instance of a backup, mounts the backup, and purges the relevant items? It’s quite unfeasible and certainly impossible at the scale of Office 365 or even large on-premises companies handling their own mail retention.
This retention conundrum is one of many challenges that spurred the creation of Exchange Native Data Protection. A means of using the built-in Exchange features to create redundant copies of Exchange data, retain it for specified time periods, purge it as required, and easily search/extract it upon request. This is accomplished without the use of a traditional backup, meaning Exchange database files are never backed up using VSS or any kind of snapshot. This has the added benefit of not requiring lengthy backup and restore job times. This was another hurdle to overcome to allow Exchange to provide mailboxes 50 GB and above while not worrying about lengthy backup/restore times of such mailboxes.
The following Exchange features make Exchange Native Data Protection possible:
- Database Availability Group
- Single Item Recovery
- Lagged Database Copies
- Recovery Databases
- In-Place Hold
Knowledge of how these features work is required if you are to design or support an environment which uses Exchange Native Data Protection. The DAG provides redundancy for databases, allowing up to 16 copies of each database (although 3-5 is more practical due to the bandwidth each copy consumes) on servers placed in one or more datacenters that can, in turn, be geographically dispersed. Should one database copy fail, or should one datacenter fail, an up-to-date copy of that database can be mounted automatically on another server with little to no data loss. In a way, the DAG replaces the need for RAID as a single disk failure will not make a database unavailable. Obviously, this also improves availability as even the failure if a single server will not make a database unavailable.
Single Item Recovery (SIR) ensures that items which have been deleted/purged by end users can still be recovered up to the DeletedItemRetention property of a mailbox database. For instance, if the value of DeletedItemRetention is set to 365 days, no matter what action a user takes on a message, it can still be retrieved from the Recoverable Items folder for 365 days after deletion, even if the user selects and then purges the item using the Recover Deleted Items feature. SIR thus avoids the resource-intense need to restore an entire database from backup media, just to recover one item. Single Item Recovery also allows preservation and recovery of mail in its original form, part of what provides Exchange with the ability to claim that its data is stored in an immutable format. To utilize SIR, a user must simply select the “Recover Deleted Items” option in either OWA or Outlook to recover the deleted email themselves. If the mail has already been purged, an administrator must utilize Exchange Management Shell or Exchange Admin Center to perform an eDiscovery search of the user’s mailbox. While somewhat burdensome, it is certainly easier and quicker than restoring from a traditional backup.
Normally, the replication that occurs within a DAG ensures that database copies are kept up-to-date as close as possible, in terms of content, to the active database copy. Lagged database copies represent a moving point-in-time of the data in the database. This is accomplished by establishing an artificial delay on when a database’s transaction logs are replayed into the database’s .edb file, meaning the replay queue for a lagged database copy always contains the transaction logs that lie outside the set of transactions that have taken place during the replay lag period. In effect, the lagged database copy is a snapshot of what the database looked like at the replay lag period (up to 14 days), thus providing the answer to the question of “how do we recover from logical corruption events?” or “how do we recover from massive data loss?” To activate a Lagged Database Copy, one must simply remove all transaction logs after and up to the point where the loss occurred and then activate the copy. Another use case for Lagged Copies is to restore them to a Recovery Database and extract the data that was lost from them.
A Recovery Database is similar to a Recovery Storage Group used in older versions of Exchange. Traditionally, this database is used as a location for restoring Exchange database files from an Exchange-Aware Backup. The restored database could then be mounted and the data restored as needed. This method was commonly used when needing to recover mail items that had been deleted or during various disaster recovery scenarios. To make use of a Recovery Database, simply create the Recovery Database object, copy/restore database files to its location, mount the database files, and leverage the New-MaiboxRestoreRequest Cmdlet to restore content from the Recovery Database into either the original mailbox or a mailbox of your choosing.
In-Place Hold is an evolution of Litigation Hold. Although both types of hold allow data to be kept for an indefinite period, an in-place hold can apply a filter to make the hold more granular so that only important data is kept. Either hold type can replace the need to retain backup tapes for extended periods for compliance purposes. The ability to hold data based on a time and content define query is what achieved feature parity with third party email archiving and compliance solutions.
Is Exchange Native Data Protection for everyone? Let’s look at the technical requirements of implementing it. It will require the implementation of a DAG, which itself isn’t a tall order to fill. However, to do without a traditional backup Microsoft recommends three highly available (non-lagged) database copies and an additional lagged copy for each database. This means a minimum of four Exchange servers deployed in a DAG, deployed across two physical locations as to avoid all nodes being within the same datacenter/failure domain. This will be the requirement that keeps most smaller-to-medium sized businesses away from Exchange Native Data Protection. They will instead implement traditional backups or consider moving to Office 365 where the operational complexities are Microsoft’s problems.
In my opinion, if you wish to stay on premises but are looking to offer a level of feature/capability parity to Exchange Online, then Exchange Native Data Protection should be your path forward. If you’re wishing to deliver mailboxes that will truly reach 10 GB or greater and you have a large number of users, operationally it simply isn’t practical to run traditional backups. Your backup sets will likely reach the point where they’re unable to compete in a reasonable amount of time, and you need to resort to a complex backup strategy to maintain operations. Of course, the first rule of designing an IT solution should be that it be only as complex as it needs to be, since complexity is the enemy of availability.
Disaster Recovery Overview
I classify Exchange disasters into their most common occurrences, database-level, server-level, and site/organization-level. Let us first define each of these failure scenarios. All important at-rest information in an Exchange environment can be found within a database. Therefore, the integrity and recoverability of the database is how Exchange data retention can be measured. Regardless of the Retention Policies, In-Place Holds, or Single Item Recovery settings in place, none will matter if the database is lost with no possibility for recovery. Many Exchange admins will go years without the need to completely recover a Mailbox Database, as most restoration scenarios are to restore a subset of information within a database (usually accidental deletions by end users). We call these disaster scenarios because the risk of complete loss of data within a database (potentially housing hundreds of mailboxes) and the inaccessibility of mailbox data can have a devastating effect on a business. These risks are mitigated by either performing traditional backups of the database files or implementing a DAG with a Lagged copy.
Server-Level failures are most commonly the result of either operating system or hardware failures. Failed motherboard, failed controller, no boot, file system corruption, and power failure are among the possible causes of an Exchange server-level failure. For a standalone environment, it means a complete Exchange outage, but for a properly designed multi-server environment it’s a fairly easy risk to mitigate. With a simplistic two-server DAG you achieve a measure of protection against a single server failure. For years, in the world of Microsoft enterprise administration, having a two-node Windows Failover Cluster in the same rack, connected to a shared SCSI storage enclosure was considered adequate protection against a server failure. At the very least, it afforded you the ability to perform maintenance on one server while the other handled the production workload. In the modern IT world, having multiple shared failure domains (same rack, same storage enclosure, even the same datacenter) is considered poor practice in terms of availability and data recoverability. The last 15 years’ worth of natural disasters have taught American businesses the value of redundant datacenters, preferably in different geographic regions.
| Real World: While site/organization-wide failures are discussed here, they typically are addressed during High Availability and site resilience design discussions. |
Regardless of the disaster category, 20 years of Exchange Server feature enhancement have given the product many built-in capabilities to enable recovery from the worst of RGE’s (Resume Generating Events). Let us first discuss database recoverability, a topic that will be aided by our understanding of the content previously covered in this chapter regarding Exchange Database Transaction logging.
Database Recovery
An Exchange database, while running and allowing users to access the mailbox data it hosts, is said to be in a “Mounted” state. While in a “Dismounted” state, no data within the database can be accessed by end users. Exchange databases rely on the Microsoft Exchange Information Store Service to function, should the service stop, all databases on that server will dismount. Some databases on a server can be in the mounted status while others are in the dismounted status, as the state of each database is managed independently of each other. In Exchange 2010 and older there was a single process associated with the Information Store Service regardless of the number of databases on a server, which was of course the infamous store.exe process. I say infamous because unknowing admins would commonly decry the service for using almost all the RAM on the server. Of course, they didn’t realize that was exactly what it was designed to do. The job of the Exchange Database Cache (Store.exe) was to handle all transactions within each database on a server, while being as efficient as possible. Exchange database cache efficiency could be defined as doing as much in memory as possible while going to disk as seldom as possible, since doing so reduces costly IO to disk. Since Exchange assumes it is the only production application on the server (as it should be in an Enterprise environment), it sees no issue with using the majority of the RAM. Exchange 2010 would use approximately 70% of installed RAM (plus ~2 GB), so it was normal to see store.exe consuming ~70 GB of RAM on a system with 96 GB of memory. Exchange 2013 and newer instead have a separate worker process (Microsoft.Exchange.Store.Worker.exe) for each database copy present on the server.
Now understanding how the databases and their cache operates, let us focus on how this data can become corrupted. Generally speaking, there are two types of corruption that can occur within a mailbox database: physical and logical. Physical corruption is things like corrupt ESE database pages, bad checksums, missing transaction log information, or anything that can result in a “Dirty Shutdown.”
| Note: A Dirty Shutdown is an ESE database state that will make the database unable to be mounted in its current state. Commonly caused by missing transaction log files (needed to complete a hung transaction) or physical corruption in the database itself. |
The Extensible Storage Engine (ESE) or “JET Blue” is a data storage technology from Microsoft that is used in Exchange Server, Active Directory, Branch Cache, and Windows Search among others. It’s important to understand that ESE is a physical data storage technology and exists at a level below the applications running on it. Therefore, ESE has no understanding of the data within the database and only concerns itself with organizing, accessing it, and validating its integrity. At the ESE level, there is no understanding of what an email or mailbox is; only tables, pages, rows, etc. The utility used to repair physical corruption in an ESE database is ESEUTIL, which has no understanding for the Exchange data within the .edb file, but only the physical integrity of the file. This is why it’s possible to use ESEUTIL to repair physical corruption but still have a database file that is unusable to the Exchange Server application. I’ve worked several cases where I was able to bring a database from a Dirty Shutdown to a Clean Shutdown state, yet when mounting the database it would immediately dismount. Usually the Windows Application logs will indicate that after mounting the database, the Information Store Service was unable to interpret the Exchange information within it. This is where the line between physical and logical meet. While the ESE understands the database at the physical level, the Microsoft Exchange Information Store accesses the data physically but handles all logical interpretation of the data. Corruption at the logical level is commonly leftover remnants of physical corruption. Corrupted physical database pages that removed logical references to mailbox data; typically resulting in search/display issues within the mailbox (or simply missing items).
| Note: The analogy I like to use when discussing Exchange physical vs logical corruption is that of a damaged book. If a book’s pages are torn out and its binding is damaged, I compare that to physical corruption in an ESE database. Now once the book’s pages and binding have been repaired (with all pages now in the correct order), it could still have logical corruption if the words on the pages don’t make sense to the reader, if the letters are smudged, the words are out of order, or it’s now in the wrong language. I compare that to logical corruption within a mailbox, commonly resulting in display, indexing, or search issues. |
Common causes of physical corruption:
- Hardware failure (power loss, component failure, etc.)
- Storage failure resulting in file system corruption
- Information Store Worker process crash
- Anti-V locking/corrupting .edb file
Common causes of logical corruption:
- Aftereffects of physical corruption
- Faulty Outlook add-ins
- Faulty mobile clients
So let’s say you encounter a physical corruption event, either via hardware failure, misbehaving anti-virus, etc. You’re left with a database which is in a Dirty Shutdown state and need to understand how to proceed forward. You must first determine if the database file (.edb) is in a Clean Shutdown or Dirty Shutdown state by issuing the below command:
[PS] C:\> ESEUTIL /mh Database1.edb
If the database is listed as in a Clean Shutdown yet cannot be mounted, you should look towards Exchange/Active Directory-related issues as the culprit. The Windows Application log will typically indicate the cause. However, if state is listed as Dirty Shutdown (and attempts to mount it fail) then the cause is likely a missing transaction log file or physical corruption in the .edb file. Missing transaction logs can be detected by running the below command (I like to think of /ml as standing for “Missing Logs”, as in “go check for missing logs”), which will parse through all present transaction logs in the log stream, indicating if any are missing or damaged/corrupted.:
[PS] C:\> ESEUTIL /ml E00
| Note: E00 is the name of the log stream, the first database on a server will use E00, the second will use E01, and so on. Each log in the log stream will use the log stream name as its base |
| Real World: Be sure to check the Recycle Bin or the quarantine container of your Anti-V software for any possible missing transaction log files, as they’re commonly misplaced there. |
If any logs are missing/damaged/corrupted, the next course of action should be to restore the .edb file from backup. The .edb file needs the transactions held within them to get into a consistent state and without them, the only course of action is a restore or an ESEUTIL /p (more on that later). Should all transaction logs be present and healthy, you may check for physical corruption to the .edb file itself as the cause of the Dirty Shutdown. This can be done by issuing using the below command to check for bad checksums:
[PS] C:\> ESEUTIL /k Database1.edb
If bad checksums are detected, the potential for recovery is unlikely. Also, it’s highly recommended to perform a chkdsk on the volume where the .edb files resided before proceeding further, to ensure the file system which the database resides on is healthy before proceeding with further recovery steps. If you’re following Microsoft’s recommendation to store Exchange databases on ReFS volumes, this step may be unneeded as it has built-in recovery mechanisms. Either way, should bad checksums be detected, the .edb file should be restored from backup. However, another option exists, the infamous ESEUTIL /p.
| Note: Further examples and detailed usage of the ESEUTIL tool can be found in the Exchange Server Troubleshooting Companion . |
Running ESEUTIL /p against a .edb file is considered by many to be “the nuclear option” of database recovery. In simplistic terms, a /p will remove anything and everything from an ESE database that it does not recognize, in an effort to get it to mount. If this is merely a few missing transaction logs which were keeping the database from mounting, then there’s likely no major risk. However, what if the corrupted portions of the .edb file were part of an important table or index? I’ve performed over one hundred ESEUTIL /p operations (in classes, labs, and unfortunately production) and in 9 out of 10 scenarios, nothing drastic happens afterwards. However, I’ve also seen a 200 GB .edb file be reduced to 500 MB after running a /p, so understand the risks involved with the process. In practice, a /p should only be run when it is your last resort. You either don’t have a backup or the only one you have is corrupted. Unfortunately, if you search online for phrases like “Dirty Shutdown” or even “ESEUTIL”, often times the first result you’ll find will be a forum or blog post with someone saying “just run an ESEUTIL /p and the database should mount.” This is akin to a Doctor recommending chemotherapy for a mole after only 30 seconds of questioning over the phone. The potential destructive consequences are far too risky to be used haphazardly.
So let’s say you’ve had to resort to running a /p and the database successfully mounted. Unfortunately your work is not done, if you wish to be in a supported state. In 2015, Microsoft announced a New Support Policy for Repaired Exchange Databases. This policy states that any Exchange database which has had an ESEUTIL /p run against it must immediately be vacated (move all mailboxes to a different database) for it to be supported. By running the below command against a dismounted database, you can determine if a /p has been run against it:
[PS] C:\> ESEUTIL /mh Database1.edb
If the “Repair Count” is anything other than 0, it means a /p has been run and this database must be vacated. After moving all mailboxes from the database, the database can then be deleted.
| Real World: Remember to also move any Arbitration Mailboxes from the database. They are not visible unless you run Get-Mailbox with the “-Arbitration” parameter. |
Let’s now discuss repairing logical corruption, which may be present after a physical corruption event. Before Exchange 2010 SP1 you would use ISINTEG, an aptly named Exchange Information Store utility (not an ESE tool) used to repair logical corruption in an Exchange database. While the database needed to be mounted while the tool was run, access to it was prevented while the scan was being performed. In Exchange 2010 SP1, the New-MailboxRepairRequest Cmdlet replaced ISINTEG as the means for repairing logical corruption in mailboxes. The most beneficial thing about the Cmdlet is that it can be run against individual mailboxes, and while that mailbox will be made inaccessible to the end user during the repair, other mailboxes on the database are not affected.
| Real World: Both “New-MailboxRepairRequest” and the process itself of moving mailboxes can be utilized to overcome physical and logical corruption. |
The format of the Cmdlet is as follows:
[PS] C:\> New-MailboxRepairRequest -Mailbox <Mailbox Identifier> -CorruptionType <Corruption Type>
The four core corruption types to choose from (via TechNet) are:
- SearchFolder
- AggregateCounts
- ProvisionedFolder
- FolderView
However, in Exchange 2013 many other types were added:
- ReplState
- MessagePTAGCn
- MessageID
- RuleMessageClass
- Restriction Folder
- FolderACL
- UniqueMidIndex
- CorruptJunkRule
- MissingSpecialFolders
- DropAllLazyIndexes
- ImapID
- ScheduledCheck
- Extension1
- Extension2
- Extension3
- Extension4
- Extension5
These corruption types are not exposed via TechNet, as Microsoft has added several that only they utilize in Office 365. While there are no support statements related to using these corruption types, I usually recommend that only the original four be used, at least for an initial run. The status and result of the request can be monitored using the Get-MailboxRepairRequest Cmdlet. As a repair request suspends access to the mailbox from all clients for the duration of its execution, it’s important to schedule it accordingly. The time needed to complete the repair will depend on the size of the mailbox and the performance of the server. I’ve personally seen a repair finish in less than a minute for a lab environment with small mailboxes, and take over an hour for larger mailboxes.
While Microsoft requires mailboxes to be vacated from a database after an ESEUTIL /p has been performed, I personally recommend, in addition, to execute a repair request with the original four corruption types against all affected mailboxes (after moving them to a new database). This can be run during off hours.
You might ask why Microsoft recommends moving mailboxes to overcome corruption events when a mailbox move is typically seen as a migration or operational activity. The answer becomes clearer when you realize what’s actually happening under the hood as a mailbox is moved. A mailbox move is really a copy event, where the raw mailbox data is extracted from the source mailbox and inserted into a new mailbox on the destination database. Once complete, the original mailbox is placed into a disconnected state where it will eventually be deleted (based on the value of the MailboxRetention parameter on the mailbox database). Think of this as you hand writing a rough draft of an essay and then writing it again in its final form, removing any errors, signs of erasure, or veering off of the lines. Instead, only the pure source material survives the process and you’re left with a clean final product. With a mailbox move, the act of moving will ignore bad/corrupted items and place mailbox data into new tables/rows/etc. within the newly created mailbox. This process removes corruption and could even be considered a sound operational practice for larger mailboxes that may be more susceptible to corruption. While it may not necessarily be required, as mentioned, I like to also run a mailbox repair request after moving a mailbox (if the purpose of the move was to remove corruption).
In practice, when troubleshooting display, search, or the inexplicable mailbox issue, I typically first recommend a repair request. If that does not resolve the issue, I then attempt to move the mailbox to a new database. In some rare cases (usually after a corruption or dirty shutdown event), a mailbox move may hang or stall. This may be caused by the mailbox becoming quarantined. One useful addition of the New-MoveRequest Cmdlet is the aptly named –ForceOffline parameter (Exchange 2013/2016 only), which forced the mailbox offline for the duration of the move; similar to how mailbox moves functioned prior to Exchange 2010. Therefore, if you encounter a mailbox move that keeps stalling or failing, and the logs (Get-MoveRequest | Get-MoveRequestStatistics –IncludeReport | FL) do not indicate anything obvious like the –BadItemLimit being exceeded, then forcing the move offline may allow it to complete.
In the worst case scenarios, you may genuinely encounter a mailbox can neither be moved nor can a repair request be successfully completed against it. In such cases, I’ve even tried running an offline defrag on the database where it resides, though that’s not a guarantee either. In these instances, you may actually need to export the mailbox data to .PST, disable the mailbox (keeping the AD user object in-tact and the mailbox in a disconnected state), creating a new “clean” mailbox, and importing the data from .PST. Obviously, a restore from backup would be preferred but I’ve encountered scenarios where this was either not possible or not practical (out of date backup usually). The outline for this process is as follows:
- Export mailbox contents to .PST either with New-MailboxExportRequest or manually using Outlook
- Do not forget calendar items
- Disable the mailbox using the Disable-Mailbox Cmdlet
- Do not mistake Disable-Mailbox with Remove-Mailbox, which also deletes the AD user object
- Create a new mailbox for the AD user using the Enable-Mailbox Cmdlet
- Import the mailbox data from .PST using New-MailboxImportRequest
While certainly a procedure of last resort, it’s actually fairly simplistic. However, remember that in addition to retaining the data, remember to capture the settings of the mailbox as well. Custom proxy addresses, storage/transport limits, or policies must be noted and reconfigured on the mailbox afterwards.
Server Recovery
In my experience, individual server recovery is more commonly seen in smaller environments. Mostly due to no other servers being available to move databases to (DAG) and keep the environment functional. Sadly, due to inexperience and ignorance in smaller environments, they’re more likely to spend hours troubleshooting the server, even if it’s desperately too far gone through the eyes of an expert. They would be much better off, and have services restored must quicker, by simply rebuilding the box. It’s a discussion I commonly have with customers in my support role. When does it make more sense to reinstall and be done in a couple hours, vs spending many hours with support in hope that you can save the existing installation? In the famous words of Bones from Star Trek, “He’s dead Jim.”
Below are the common causes which would justify an Exchange Server recovery:
- Corrupted OS/No Boot scenario
- File system corruption resulting in application binary corruption
- Misconfiguration in underlying software (IIS/.NET/UCMA/TCPIP/etc.)
- Complete loss of server (fire/flood/storage failure/etc.)
As I covered at the beginning of this chapter, the entire operating system is not typically backed up, as the Exchange Product team has never encouraged “image-based backups.” Therefore when a server fails, the recommendation is to either move resources to another Exchange Server (assuming a DAG) and build a new server in its place, or to perform a Disaster Recovery Installation of Exchange. This is sometimes referred to as a “Recover Server Installation”, after the “Setup /m:RecoverServer” command-line switch used in the procedure. Of the various Exchange Disaster Recovery scenarios, the Disaster Recovery Installation is the most intimidating to the uneducated, namely because it reinstallation. To people who are only in charge of administering a product, the idea of formatting the operating system, installing Exchange via command-line, and restoring databases might seem daunting. However, this process is actually quite easy (assuming your Active Directory environment is healthy and your backup of the database files are consistent).
The process for performing a Disaster Recovery Installation of Exchange is as follows. This process has gone largely unchanged since Exchange 2003:
- An Exchange server installation is lost or beyond repair
- The system is reinstalled with the same Operating System and brought back to the same patch level as the previous server (DO NOT attempt to gracefully uninstall Exchange or attempt to disjoin the server from the domain; I recommend a format of the OS and Exchange application partitions)
- The Computer Account for the Exchange Server should be reset
- Configure the Computer Name on the new installation the same as the previous server
- Rejoin the computer to the domain
- Install Exchange prerequisites including the same CU version of Exchange that was previously installed (the same CU version as what was previously installed should be used)
- Open an elevated Command Prompt on the server to be recovered and run the below command:
- Setup /m:RecoverServer /IAcceptExchangeServerLicenseTerms
- Note: If Exchange is installed in a location other than the default location, you must use the /TargetDir switch to specify the location of the Exchange binary files. If you don’t use the /TargetDir switch, the Exchange files are installed in the default location (%programfiles%\Microsoft\Exchange Server\V15).
- This causes the Exchange installation to look to Active Directory and pull the Exchange Server configuration that was previously present onto this server
- Once completed and the server is restarted, any databases will be dismounted
- At this time, restore databases from backup
- Import and assign any previously installed certificates
- Apply any previously configured customizations to the Operating System and/or IIS
The beauty of this approach is that all server-related configuration information, such as virtual directory URL’s, Outlook configuration information, and customizations will be retained. Essentially, anything configured using the Set-ExchangeServer, Set-MailboxServer, Set-TransportServer, and Set-ClientAccessServer Cmdlets or the relevant Set-*VirtualDirectory Cmdlets, among others. However, any customizations to IIS, such as HTTP redirection or web.config file settings will require reconfiguration, as those settings are not stored in Active Directory and therefore cannot be recovered. Common mistakes are trying to uninstall Exchange or disjoining the computer from the domain (assuming the installation was still reachable). This will result in the Exchange installation being removed from Active Directory and the link between the computer account and Active Directory being broken respectively.
In some scenarios, I’ve actually seen where the Exchange computer account has a trust relationship or permissions issue with Active Directory and you encounter trouble with the /RecoverServer approach. Fortunately, since Exchange 2010 and the advent of Database Portability, a Mailbox Database can be mounted on any Exchange Server in the organization. Therefore, even if you do not have a DAG in the environment, a database can be mounted on a newly installed server in a recovery scenario.
| Real World: Technically speaking, an Exchange 2010 or newer mailbox database can be mounted in any Exchange organization, as long as the Exchange Organization Name is the same. If you had to perform a complete environmental rebuild (including Active Directory) or wanted to restore to a separate Active Directory environment, you need only configure Exchange with the same Organization name and the database will mount successfully. The mailboxes will of course be in a “disconnected” state and will need to be reattached to Active Directory user accounts. |
The process for this would be as follows:
- Install and patch Windows by running Windows Updates on a new server with a new name
- Install Exchange prerequisites
- Install new Exchange Server (do not use /RecoverServer option as this will be a new Exchange Server installation)
- Configure all URLs, certificates, or customizations to match previous server (most can be found using ADSIEDIT if server is no longer accessible)
- Create new Mailbox Database, dismount new database, remove all database files, copy-paste backed up (original) database files to location
- Run following command to mark new database as able to be overwritten: Set-MailboxDatabase –Identity <NewDBName> –AllFilerestore $True
- Mount database
- Re-home mailboxes to the new database (which will map the AD user accounts to the disconnected mailboxes in the restored .edb file) by running “Get-Mailbox –Database <OldDBName>| Set-Mailbox –Database <NewDBName>”
- Do the same for any Arbitration mailboxes which were housed on the database by running “Get-Mailbox –Database <OldDBName> –Arbitration | Set-Mailbox –Arbitration –Database <NewDBName>”
Using this method, services are restored within the 1-2 hours it takes to deploy a Windows OS, install Exchange binaries, and restore/copy database files. All Exchange configuration tasks are fairly straightforward, especially if scripted/automated.
This brings me back to my previous statements around troubleshooting a problematic Exchange Server vs a rebuild. I’m a strong proponent of simplicity and uptime, as I would think all administrators would be. Unfortunately, some people fall into the trap of digging too deep into the weeds, trying for hours on end to troubleshoot an issue which may have been a fluke. Maybe it’s the inner Engineer in all of us wish to get down to the bottom of every issue. However, the business ultimately cares more about uptime than our own individual curiosities. Microsoft has even admitted that in Office 365, they spend little time troubleshooting individual servers, instead opting to “log occurrence, move resources off, shoot it in the head, and rebuild via automation” as one Program Manager put it. They only begin deep troubleshooting if an issue is systemic, and avoid “diving into the weeds” on issues which may simply be a fluke. So I can only recommend practicing the above server recovery procedures in a lab so you can give accurate information to your customers/supervisors regarding your recovery options during a disaster.
My most commonly used blog posts for troubleshooting Exchange
Aka. The Greatest Hits Collection…
Overview
Over the years, I’ve found a common reason for blogging is not only to share information with others, but also to help yourself when enough days have passed that you’ve forgotten your own advice. In my role as a Domain/Practice Lead in our Support organization, there are certain posts of mine that I frequently refer people to as well as find myself using in the field.
With that in mind, here’s a list of some of my most commonly referenced posts, along with reasons why they’ve proven useful:
Note: Like having a resource for Exchange troubleshooting tips? I’d also recommend the Exchange Server Troubleshooting Companion that Paul Cunningham and I wrote. You’ll likely find many of these within it as well.
Quick method to diagnose Exchange Active Directory Access & Service Startup Issues
Info: Active Directory and DNS issues are one of the most common Exchange support issues. When Exchange is having service startup issues or random failures, it’s useful to be able to utilize Event Viewer to determine if Exchange is properly able to access the Global Catalog servers in the environment.
Checking for Open Relay in Exchange 2007/2010 (and Exchange 2013/2016)
Info: The most useful piece of information from this post (aside from explaining the differences between SMTP Relay and Submit) is the below command I frequently use to check for Receive Connectors that have been configured as an Open Relay:
Get-ReceiveConnector | Get-ADPermission -User “NT Authority\Anonymous Logon” | Where-Object {$_.ExtendedRights -like “ms-Exch-SMTP-Accept-Any-Recipient”} | Format-List Identity,ExtendedRights
Quick method to determine installed version of .NET Framework
Info: With Exchange 2013, it became extremely important to ensure you were running on the appropriate (and supported) version of .NET Framework. A quick method to determine this (given to me by my good friend and fellow Exchange MCM Mark Henderson) is to use the below command to pull the currently installed .NET version, then compare it to the versions listed in the post:
(Get-ItemProperty ‘HKLM:\SOFTWARE\Microsoft\NET Framework Setup\NDP\v4\Full’ -Name Release).Release
Once again, Unchecking IPv6 on a NIC Breaks Exchange 2013
Info: Probably my most commonly referenced topic when it comes to Exchange networking; IPv6. Microsoft’s statement is fairly simple when it comes to IPv6 (this goes for every product line), they perform zero testing or validation on Windows with IPv6 disabled. Simply put, good luck with disabling it. The point of my post is that should you choose to disable it, do it via the registry and NOT just unchecking it on the NIC.
Common Support Issues with Transport Agents
Info: Transport Agents are a common cause of mail flow issues with Exchange, at least when they’re misbehaving. At the very least, know how to utilize the “Get-TransportAgent” command and what each Transport Agent does, especially the third-party agents.
ActiveSync Synching Folders but not Mail
Info: While this post initially focuses on ActiveSync, the real issue it addresses is the impact of corruption on a mailbox, as well as why it’s not a good idea to run an ESEUTIL /P on a database
Incorrectly Adding New Receive Connector Breaks Exchange 2013 Transport
Info: This is a fairly common issue with Exchange 2013 (though technically the GUI should now prevent this issue from happening) where two different Exchange Transport services could end up listening on the same port number and causing issues
Understanding controller caching and Exchange performance
Info: Working for a hardware vendor, I spent a lot of my time helping customers with their storage solutions for Exchange. I commonly get pulled into Exchange Calculator or Jetstress escalations and this post has become a very useful reference for explaining the importance Controller Caching, even when using an Exchange JBOD architecture.
Overcoming corruption during mailbox moves
Info: I could retire if I had a dollar for every hour I’ve spent helping customers overcome corruption issues with Exchange, usually the result of running an ESEUTIL /p and not vacating the database afterwards. This is a great reference I like to send customers and frontline phone agents which describes how to recover from such corruption.
CPU Contention and Exchange Virtual Machines
Info: In past conferences like IT Dev Connections, I’ve said that CPU overcomittment and the resulting contention is THE most common Exchange Virtualization support issue I encounter. This is a great article to send to someone who is struggling to understand how CPU overcomittment works and still somehow thinks that virtualization is just magic, where you can give a VM as many resources as you want and it will just work 🙂
A Practical Look at Exchange Database Internals — Part 1
A Practical Look at Exchange Database Internals Part 2: Transaction Logging and Recovery
Info: These articles are great references when attempting to explain or understand Exchange Transaction logging. This topic is important to understand when working with Exchange Backups, DAG log shipping, and HA recovery.
Info: A very common issue encountered after an improperly performed Legacy-to-Modern Public Folder migration which results in Outlook pop-ups.
Unable to Delete Exchange 2016 Database
Info: A common issue when attempting to delete an Exchange Mailbox Database (typically the first one which was created by the system). The important commands to remember from this post are the following:
Get-Mailbox –Database MailboxDatabase –Arbitration
Get-Mailbox –Database MailboxDatabase –AuditLog
Info: Going back to my previous statement about improper DNS settings being one of the most common causes of Exchange issues, this post discusses the impact NIC DNS settings can have on an Exchange Server.
Remember the basics when working with Dynamic Distribution Groups (I didn’t)
Intro: I honestly didn’t expect this to be a popular post, but oddly enough, the topic of Dynamic Distribution Lists is a very common one on the forums. While the issue I experienced wasn’t extremely common on its own, the explanations within the post about how DDL’s work has become a common point of reference.
Troubleshooting Issues with Client Access Servers
Info: The blog post that spurred the idea for the Exchange Server Troubleshooting Companion. I often refer people to it when they need to recreate an Exchange Virtual Directory.
Deploying & Configuring Server 2012 R2 Essentials with Office 365
Info: Having spent a lot of time working with small businesses and SBS, I wrote this post hoping to shine a light on the benefits of the Essentials Office 365 integration tools and how they’re a great alternative to using Directory Synchronization for small businesses. I tend to send this link to customers and colleagues once a month as I’ve found most people don’t even know what Essentials is.
As time goes on, I plan to update this post as needed…
Microsoft Ignite and the Exchange On-Premises story
As I opened my Friday session on Dive deep into Microsoft Exchange Server High Availability at Microsoft Ignite, I made mention of it being a session focused on on-premises Exchange. This was met with much applause from the attendees. This actually didn’t surprise me much, as the feedback from customers throughout the week had been their strong desire to see more on-premises sessions (especially for Exchange). During the panel session I participated in on Tuesday, I actually attempted to explain this trend from my perspective.
Before I drag on, I’d actually like to call out the fact that there were several Breakout sessions (at least on Exchange) that had a primary focus on-premises:
Deploy Microsoft Exchange Server 2016
Understand the Microsoft Exchange Server 2016 Architecture
Investigate tools and techniques for Exchange Performance Troubleshooting
Experience Scott Schnoll’s Exchange tips and tricks – LIVE
Move from Exchange 2007 to Modern Exchange
Debate the top 10 reasons not to move your Exchange on-premises mailboxes to Exchange Online
Design your Exchange infrastructure right (or consider moving to Office 365)
Run Microsoft Exchange Hybrid for the long haul
Dive deep into Microsoft Exchange Server High Availability
I call these out not only for your viewing pleasure, but also to dissuade the idea that the Exchange Product Marketing team has forgotten on-premises Exchange.
So back to my rambling. Throughout the week, myself and other speakers kept getting feedback that attendees wanted more on-premises content. Whether it was via verbal polls during sessions, audience feedback, or in the session evaluations, the message was clear. As someone who still spends the majority of his time working with on-premises customers, I could certainly understand their feedback.
One interesting thing my colleagues and I noticed however was that the majority of attendee questions involved Hybrid or Office 365 in some way. I took this to mean most attendees were at least interested in “dipping their toes” in the cloud waters so to speak. While I understand the cloud isn’t for everyone, I find it hard to envision a world of the future where most customers don’t have at least some kind of cloud footprint.
Not only is change a sensitive topic for some, nostalgia can trigger a very strong emotional response. The explanation I gave in the panel was that it likely feels as though the Exchange on-premises content has dropped off because we just rode a huge wave of Exchange innovation over the past 5-6 years.
Let’s look at just some of the changes the product has seen since Exchange 2010 was released:
- Database Availability Groups (removal of Single Copy Cluster as a deployment option)
- Exchange Native Data Protection (achieved via a multitude of new features)
- Ability to deploy on JBOD using “Big Cheap Disks”
- Hybrid Configuration (including numerous Directory Synchronization/Identity/Multi-Forest scenarios)
- e-Discovery & Compliance
- Exchange Admin Center
- Death of traditional Public Folders and birth of Modern Public Folders
- Death of ISA/TMG
- Multiple new mail clients (Outlook App/OWA App/etc.)
- Feature rich integration with Lync/Skype for Business/SharePoint
- Multitude of new migration options to Office 365 (IMAP/Cutover/Staged/Hybrid/etc.)
- Death of Small Business Server and birth of Windows Server Essentials Office 365 Integration Tools
- Introduction of MAPI over HTTP
- Introduction of Modern Authentication
An extensive list, consisting of many game-changing features which drastically changed the way companies use email and how Exchange Professionals make a living. Before these changes, we were still deploying Exchange on expensive SANs, the only mailboxes in the “cloud” were via hosting companies, nobody cared who Edward Snowden was, and hosted email archiving was a pretty good business to be in. And to think, all this happened within ~6 years. It seemed every post on the Exchange Team Blog had some new drastic change that was altering the way we use email, usually for the better. At TechEd/MEC, you had to decide which Exchange session to skip because so many were available.
This influx of new functionality not only changed the landscape of on-premises deployments, it enabled Office 365 to become what it is today. There’s no way Microsoft could offer reasonably priced high-performing 50 GB mailboxes in Office 365 if they still relied upon traditional backups and SAN storage using 15k disks.
In my opinion, we’ve simply transitioned from on-premises innovations enabling Exchange Online to exist, to Office 365 gracing on-prem with its breakthroughs. There simply aren’t enough new things to talk about in the on-premises Exchange world. Aside from all the new Hybrid goodness (much of which was brought to us by Tim Heeney at Microsoft Ignite), most new on-premises functionality have centered around High Availability (Replay Lag Manager/Read From Passive/Automatic Database Balancing/etc.).
So maybe this post has been a long winded way of saying that Microsoft isn’t ignoring On-Premises, but rather that there’s less to talk about there. I don’t view it as them abandoning their customers, but focusing on where the educational needs are greatest due to rapid growth. Also, it’s hard to blame a publicly-traded company (who have a responsibility to their shareholders to make money) for focusing on what has been to date, one of the most profitable things they’ve ever done.
Note: If you’re unsure whether the proper terminology is “On-Premises” or “On-Premise”
I’ll be speaking at IT/Dev Connections 2016 this October in Las Vegas
For the third year in a row, I’ll be speaking in Vegas once again at IT Dev Connections, a week-long conference covering Enterprise Collaboration, Cloud/Data Center, Development, Mobility, Enterprise Management & much more. This year I’ll be presenting:
Exchange Virtualization Mistakes to Avoid
There are correct and incorrect ways to deploy a virtualized Exchange solution. Uncover the risks of a poorly implemented virtual Exchange solution and how to best avoid them. Learn about:
o Sizing a virtual Exchange solution
o Monitoring a virtual Exchange solution and detecting the early signs of poor performance
o Recovering from failures and misconfigurations
Office 365 Migration and Administration for Small Businesses
Discuss migration options for Small Businesses as well as discuss new features Microsoft is rolling out which small businesses may find useful. Cover the best tools for managing a small Office 365 tenant that still has an on-premises presence (via Directory Synchronization or file services). This session will describe options & provide guidance on the following: Cutover vs Staged vs IMAP vs Hybrid migration options for small businesses; Discuss pros and cons of each option; When directory synchronization makes sense and when it doesn’t; Pros and cons of Azure AD Connect and Exchange management; Windows Server Essentials pseudo-Password Synchronization option; Discuss options the Windows Server Essentials role brings to customers and service providers; Discuss features in Office 365 many customers can take advantage of which they may not be aware of.
Exchange Performance Disaster Recovery and Migration Troubleshoooting
This is a split session, consisting of both disaster recovery and migration troubleshooting content. This session will expand on content from the Exchange Server Troubleshooting Companion.
Taking a spotlight approach to the topics of Performance, Disaster Recovery, and Migration troubleshooting to provide the audience with useful tools/techniques in the field. This session will cover the following topics: Monitoring Exchange in key performance areas to maintain a properly performing Exchange installation; Tools and methodologies for troubleshooting Exchange Performance issues; Common Disaster Recovery scenarios you should prepare for; Methodologies and procedures for navigating Disaster Recovery scenarios; Common hurdles when performing an Exchange migration; Tools and methodologies for troubleshooting and navigating Exchange Migration hurdles.
October in Vegas can be warm at times, but still comfortable. However, the Aria Resort & Casino is always inviting and full of fun. Book your spot now, I hope to see you there & please feel free to chat me up at the conference!
Exchange Server Troubleshooting Companion Released
Announcement
Paul Cunningham and I have spent a lot of time troubleshooting Microsoft Exchange. Not only in our careers as IT Professionals but also in various communities and forums. We’ve often encountered other IT Professionals asking what they can do to grow their Exchange skillset, or learn how to become a more effective Exchange Server Troubleshooter. Maybe it’s someone beginning their careers and wishing to become an Exchange expert, or someone who is established in the IT profession but has recently been charged with maintaining an Exchange environment. Or maybe someone wishing to give their helpdesk staff a bit of a boost in proficiency of handling inbound Exchange cases.
When asked, I’ve often tried to point them to published books, blogs, videos, etc. However, much of what’s available is either scattered in various different places or is written from a product feature or marketing perspective. This past year we began work on a book that focused on troubleshooting Exchange as well as how the product works “under the hood” so to speak. With a focus on function and a layout which allows you to read at your own pace (or to use it as a troubleshooting reference with many relevant links to tools/blog/etc.), I’m very proud of the product we’ve produced.
To create this book, Paul and I spent a lot of time comprising much of our own “tips and tricks”, “do’s and don’ts”, and best practices for Exchange troubleshooting that we’ve gathered over the years. Along with it, we wrote in-depth explanations for how the product works as well as our beliefs of how an IT Professional should go about troubleshooting Microsoft Technologies.
Who is the book for?
- New IT Professional expected to manage or support Exchange Server
- Seasoned IT Professional who may be tasked with supporting Exchange Server, though they may not have extensive experience with the product
- Helpdesk staff required to support Exchange Server or various clients used to connect to Exchange Server or Office 365
- IT Professional looking for practical, real-world scenario, training material for Exchange Server
Just Some of the Troubleshooting Topics Covered
- Client Access/Certificates
- Exchange Transport and SMTP Mail Flow
- Mailbox Services
- Clients
- Performance
- Active Directory
- Migration
- Hybrid
- Backup and Disaster Recovery
- Security
- High Availability
Book Information
Direct Link to Exchange Troubleshooting Companion
ExchangeServerPro Podcast Episode Discussing New Book
Exchange Server Troubleshooting Companion Now Available
Authors:
Andrew Higginbotham
Editor:
Technical Reviewer:
2015 Year in Review
While most of my troubleshooting blogging gets recorded on Exchangemaster.Wordpress.com, my other blogging and various activities are a bit spread out. It was a busy 2015 for me so I thought I’d make a digest here of all my Exchange-related activities for the year.
Blogging
- Tracking Down Overactive Mailboxes With Get-StoreUsageStatistics
- CPU Contention and Exchange Virtual Machines
- Overcoming corruption during mailbox moves
- Understanding controller caching and Exchange performance
Speaking/Webinar/Webcast/Podcast
- Speaking at IT/Dev Connections
- ExchangeServerPro Podcast Guest
- Dell Software Webcast
Books
- MS Press Book (Technical Reviewer) – Exam Ref 70-342 Advanced Solutions of Microsoft Exchange Server 2013 (MCSE)
- eBook (Author) – What’s New with Microsoft Exchange 2016 and Office 365
Miscellaneous
Continued moderation of the Exchange Server Subreddit which currently has 3.5k subscribers & ~30k page views per month.
Looking forward to a great 2016!
I’ll be speaking at IT/Dev Connections 2015 this September in Las Vegas
In less than two months’ time I’ll be flying up to Vegas once again to speak at IT/Dev Connections, a week-long conference covering Enterprise Collaboration, Cloud/Data Center, Development, Enterprise Management & much more. Following-up from my sessions last year, this year I’ll be presenting:
End-to-End Exchange 2013 Troubleshooting Scenarios
In last year’s session I covered many useful tools & techniques for troubleshooting Exchange Server. Due to popular demand, I’ll be delivering a similar session with a slightly different spin. I’ll be covering commonly seen break-fix scenarios based on real-life customer support calls. We’ll go from identifying the issue, gathering data, resolving the issue, & preventing similar issues from happening again. I’ll showcase useful troubleshooting techniques as well as some lesser known tools to keep in your tool belt.
Storage Configuration Options for Exchange 2013
Much time has been spent debating which storage solution Exchange should be deployed on (often dependent upon cost, simplicity, politics, existing infrastructure, etc.) but this session will instead focus on how to best deploy on the various storage solution options once that decision has been made. I’ll also go into proper storage testing & validation procedures for when it’s time to actually go live with it all.
So while Vegas will likely be pretty hot the week of Sept 14th-17th, The Aria Resort & Casino is quite comfortable. Book your spot now, I hope to see you there & please feel free to chat me up at the conference!
Troubleshooting Issues with Client Access Servers
When I wrapped up content creation for my session on Troubleshooting Exchange 2013 for IT/Dev Connections this September in Las Vegas, I soon realized I had a problem. I was tasked with delivering a 60min session but I had created enough content for an entire day of delivery!
I managed to get the session down to around 60min but I still kept all the content in the deck. There’s a ton of information in the slide notes as well as many hidden slides, so be sure to download the deck afterwards if you’re an attendee. If you’re not an attendee, then how’s a last minute trip to Vegas sound?
However, I decided to use this blog to expand on a topic I just couldn’t do justice within a 60min time frame. Hopefully this can give people a look at the type of content being presented at Exchange Connections as well as a starting point if they’d like to grow their troubleshooting skills. So in this post I’d like to cover common break-fix issues seen with Client Access Servers; even though technically some of these components live in the Mailbox Server role now.
Overview
The first step to troubleshooting any technology, I feel, is to understand the functionality of its core components during normal operation. Often time people are given a set of tools to be used in troubleshooting but never truly understand how to interpret the data they’re looking at. Similar to how using NetMon will be of little use to someone who doesn’t have a solid understanding of TCP/IP, looking at Exchange Client Access or IIS data will not prove useful if you do not understand how each of the components interact with each other. Let’s begin by looking at IIS.

What we see above is the IIS Manager on my Server 2012 R2 Exchange 2013 CU6 multi-role server. We find the various web sites as well as the Application Pools that correspond to each application like ActiveSync, PowerShell, or OWA. Because this server is multi-role (has both CAS & Mailbox Roles installed) you will see two separate Exchange web sites:
Default Web Site = Client Access Server Role
Exchange Back End=Mailbox Server Role
The two main services associated with IIS are the IIS Admin Service (inetinfo.exe) & the World Wide Web Publishing Service (w3wp.exe). To oversimplify it, inetinfo.exe corresponds to IIS configuration information whereas w3wp.exe corresponds to each of the various Application Pools. After changing IIS configuration information (like Auth Settings, etc.), the IIS Admin Service will typically be what you’ll want to restart. Whereas, if a particular application still isn’t updating after you’ve made a change (like OWA or ActiveSync) then you may need to Recycle that Application Pool & at worst, restart the WWW Publishing Service.
However, in many cases it’s recommended to simply stop/start the website or recycle the application pool rather than restarting the services or using iisreset (Reference-A Reference-B Reference-C). This is because it’s possible IIS has not saved the necessary changes in time & those changes could be lost by a forcible service restart. Starting/Stopping the websites, recycling the application pools, or using the “/noforce” switch for iisreset is preferred. However, sometimes killing a service is all you can do in a troubleshooting scenario.
Web Sites & Application Pools in Exchange 2013
When troubleshooting IIS, I commonly find myself looking at the Web Site Bindings. These are what “bind” an IP Address, Port Number, Host Name, & (potentially) a Certificate to the web site. Let’s look at the bindings using both PowerShell as well as the GUI.

Using the above series of commands (reference) I was able to import the IIS PowerShell Module & query the bindings of my two web Sites in IIS. I’ve found that using PowerShell is a very handy way to query this data fairly quickly. It’s also useful for when you need to send a customer a set of commands they can run & send the data back to you. Here’s a few of my preferred information gathering commands:
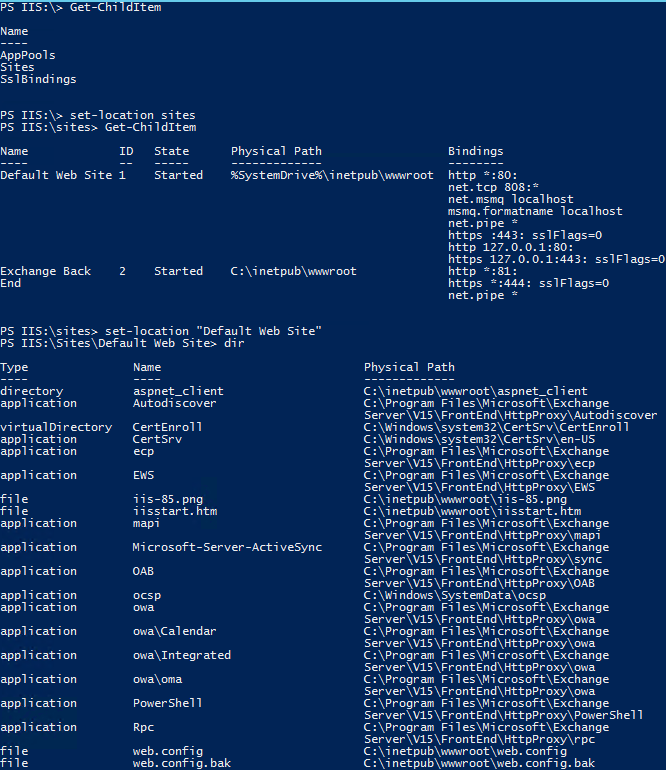
The above series of commands has me navigating to the “Default Web Site” & viewing the various Applications & Virtual Directories underneath it. Notice how the commands work similar to navigating a folder structure. If I need to go back a level I can simply use “cd ..”. Alternatively, if I wanted to export this to a text file I could repeat the last command but with a Format-List at the end “dir | fl > C:\IISOutput.txt”. This can be useful when comparing a known working server to a problematic one. Of course there’s also any number of ways this data can be scripted/manipulated/etc. to fit your needs.
Note: The Default Web Site has bindings of 80 & 443 for HTTP & HTTPS while Exchange Back End has 81 & 444. When you make a connection to Exchange using HTTPS you’re connecting to the Default Web Site & it’s proxying it back to the Exchange Back End web site. Do not change the bindings on the Exchange Back End website.
Now if I go back to the root I can see a list of all the Application Pools in IIS.

Alternatively you could just use the Exchange Management Shell for some of these commands but you might find the IIS Module gives you a bit more flexibility.
Now to look at these settings in the GUI may seem easier but it does require a bit more mouse clicks to get all the same data:
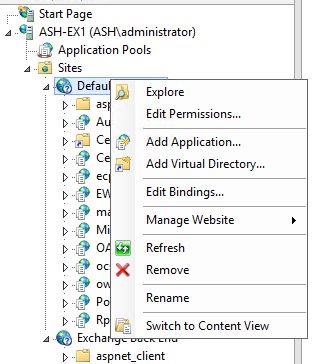
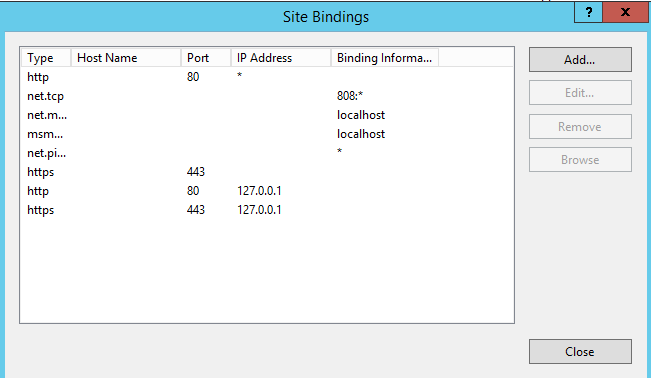

How it can break
Bindings & Firewalls
So we know how things are laid out but now let’s look at what I most commonly see broken from customers. I’ve always said one of the best ways to learn something is to break it in a lab 🙂
Excluding Certificates (which I’ll discuss later), the most common IIS-related issue I see is related to IIS Bindings. I’ll commonly encounter customers trying to install a 3rd party application or a Microsoft application that is not explicitly supported on an Exchange 2013 Server (SharePoint, RDS, Lync, etc.) & in the process their bindings will get messed up. Allow me to demonstrate.
Say I’m logged into OWA on my multi-role 2013 server.
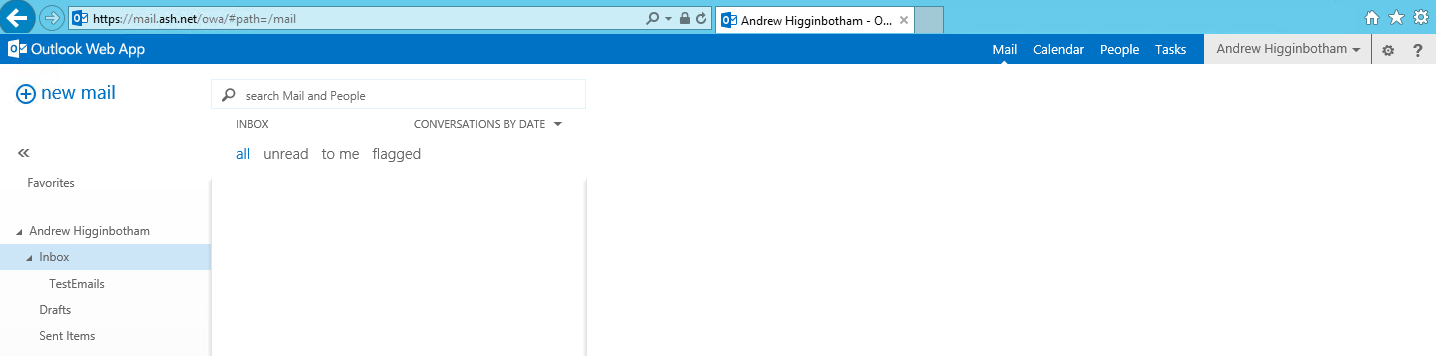
Now within IIS I right-click Exchange Back End>Edit Bindings & change the HTTPS binding from 444 to 445
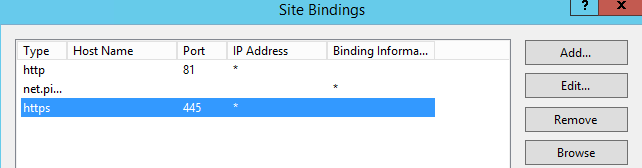
If I now refresh my browser I’ll be greeted with a blank page.
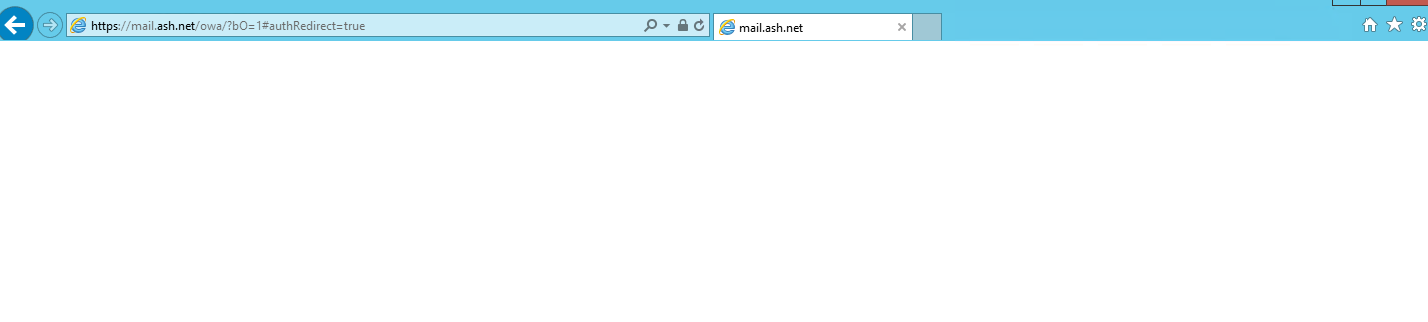
This is because, by design, the Default Web Site has the traditional web server bindings for port 80 & 443, while the Exchange Back End website uses ports 81 & 444 for HTTP/HTTPS connectivity. When the Client Access Server role is communicating with the Mailbox Server role for IIS –related functions, it proxies these connections via HTTPS using port 444. So the expected flow for UserA logging into OWA on ServerA (single server environment for this 1st example) would be:
UserA using browser client
|
ServerA Default Web Site (over port 443)
|
ServerA Exchange Back End website (over port 444)
|
RPC Communications to the local MSExchange RPC Client Access Service
|
MAPI to the MSExchange Information Store Service
Now how would the traffic flow look if we were connecting to https://ServerA/owa with our browser but our mailbox (UserB) was on a database that was mounted on ServerB? Let’s have a look:
UserB using browser client
|
ServerA Default Web Site (over port 443)
|
ServerB Exchange Back End website (over port 444)
|
RPC Communications to the local MSExchange RPC Client Access Service (on ServerB)
|
MAPI to the MSExchange Information Store Service (on ServerB)
As you can see, in this scenario while the client connects to OWA using 443, CAS proxies that connection to the relevant Mailbox Server over 444 (over the network). If you really want to see this in action then you can use a tool like NETSTAT to view connections between your servers:
In the below example I see a local connection to 443 & an associated Process ID (PID). I can use Task Manager to see that PID correlates to an instance of Internet Explorer (iexplore.exe), which I have open & connected to OWA (https://127.0.0.1/owa).

The below command was run from the same server but for port 444; this output is quite a bit busier. There’s the connection to the local server for the OWA session that I’m logged into (the mailbox I’m logged in with is on a database that’s mounted locally). However, you’ll also find there’s a connection to 10.180.62.191, which is one of my other Exchange servers in the environment. This is for another instance of OWA I have open for a mailbox that’s currently mounted on that server. In that case the PID corresponds to an instance of w3wp.exe (World Wide Web Publishing Service). The other PIDs correspond to background processes like Microsoft.Exchange.ServiceHost.exe (MSEXchange Service Host Service), MSExchangeHMWorker.exe (MSExchange Health Manager Service), & MSExchangeMailboxAssistants.exe (MSExchange Mailbox Assistants Service). These are all background processes that are constantly running behind the curtains to keep Exchange up & running (synthetic transactions, maintenance tasks, etc.).
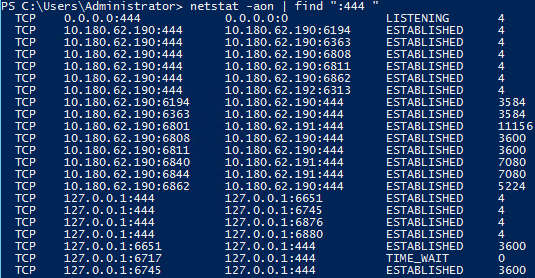
So it’s fairly common to see customers accidentally change the bindings or delete them. Unfortunately, their attempts to repair the web sites typically result in them using the incorrect port numbers (like putting 443 on the Exchange Back End site). Alternatively, customers (or their network security admins) may block port 444 traffic between servers & suddenly find their servers in a state of sad uselessness.
Recreating Exchange Virtual Directories
Since the time of Exchange 2003, Microsoft has given you the ability to recreate Exchange Virtual Directories for troubleshooting purposes. In Exchange 2013 you have the option to reset/recreate the Virtual Directories either from within EAC or Exchange Management Shell.
Recreating the various Virtual Directories has been a useful troubleshooting step in the past but I’ll be honest when I say that it’s usually done as a last ditch step whenever every other avenue of troubleshooting hasn’t helped. In fact, if recreating the vDir doesn’t resolve the issue I’m usually looking at a /RecoverServer install as the next step. But it has been useful when OWA/ECP/ActiveSync/EWS/OAB/PowerShell/AutoDiscover don’t work as expected & you’d like to reset the relevant Virtual Directory to defaults.
Note: Recreating the Virtual Directories will reset any settings or customizations you have done to it so I recommend running a “Get-OWAVirtualDirectory | FL” or similar command beforehand to grab the existing settings. In fact, if you use EAC to reset the VDirs then you’ll be prompted to save the configuration to a network path.
There are two ways to perform this action, EAC (GUI) or EMS (Shell). Let’s look at the EAC method first:
You can go to EAC>Servers>Virtual Directories, select the Virtual Directory you wish to reset & then click the Reset button.

Here we see the prompt you’ll receive to backup the current Virtual Directory settings before resetting it.

After clicking “Reset” the Virtual Directory will be removed & then recreated. Afterwards you’ll need to restart IIS.
Now how would we do this with shell? It’s fairly simple:
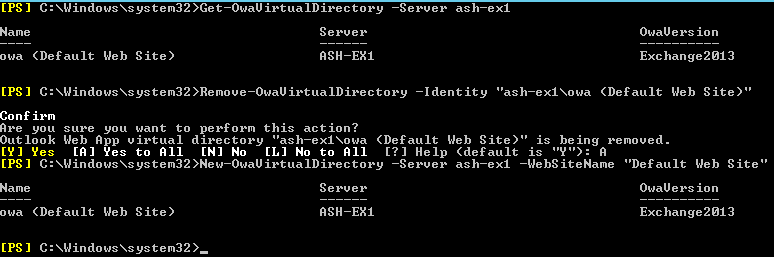
Now this works when we have an issue with the Default Web Site but I’ve actually run across a case where I had to recreate the OWA Virtual Directory on the Exchange Back End site as well. To do this I would run the below commands:
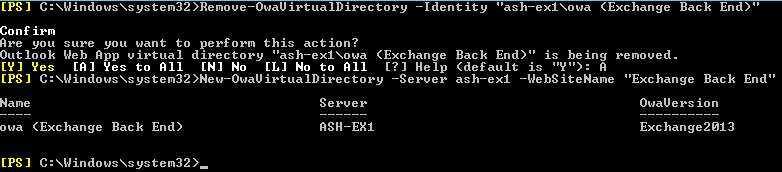
PowerShell
Now what if you’re having issues with the PowerShell vDir? You likely can’t connect to that server to manage it via EMS or EAC so you’re going to have to load the local PowerShell snap-in using the below commands:
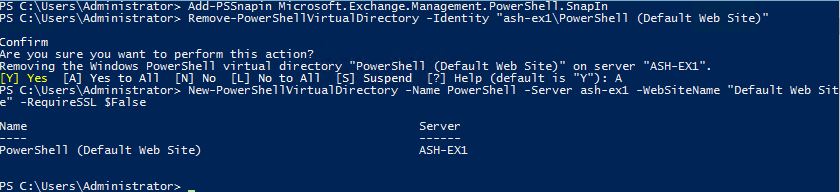
Since we’re on the topic of PowerShell, on occasion I’ve found myself having to verify all the proper Modules are added for the PowerShell vDIR.

The best advice I can give you is to compare the loaded modules here to a known working server (or lab machine). On several occasions I’ve found the kerbauth module to be missing & I’ve had to re-add it. I saw it on several occasions in Exchange 2010 but not yet in 2013; but regardless, the proper modules will be needed in order for things to work properly on any version of Exchange.
Note: Also make sure that any & all file directory paths have the proper permissions set on them. Again, it’s helpful to have a known working server to use as a comparison. Also, be sure that all proper Anti-Virus Exclusions have been configured (extremely common scenario). (Reference)
Certificates & Naming
By far, Certificates are the most common CAS/IIS-related support issue I see; which is odd considering the core concepts are not that difficult. Much like understanding core TCP/IP functionality, I feel core PKI & SSL knowledge should be something every IT professional should learn early on in their careers.
You don’t have to be an expert but you should understand the 3 golden rules of trust: Do I trust the issuer of this certificate? Is the certificate expired? Is the name I’m using to connect to this service listed on the certificate?
Knowing these things will help us to understand which names we need to put onto our Exchange certificate when requesting it. You can technically get away with only having 1 name on your certificate in a simplistic environment with limited requirements (which also seem to be the environments where less experienced customers are unsure of their options). For instance:
Example-A
Name on certificate:
Mail.Contoso.com
Split DNS Enabled=Yes (Mail.Contoso.com resolves to CAS both internally & externally )
Outlook Anywhere Internal & External Namespace=Mail.Contoso.com
OWA/EWS/OAB/ActiveSync Internal and/or External URL’s=Mail.Contoso.com
AutodiscoverServiceInternalUri=Mail.Contoso.com/AutoDiscover/AutoDiscover.xml
In this example, everything would work except for non-domain joined Outlook clients & ActiveSync automatic profile creation. This is because you won’t have AutoDiscover.Contoso.com on your certificate so the process will not be seamless. You’ll either be greeted with certificate warnings or the connection just won’t work. Now technically you can get non-domain joined Outlook clients to work if you create an SRV record for AutoDiscover but there’s no workaround for ActiveSync. Your users will have to manually enter in the server name when creating ActiveSync devices. Also, depending on how your device handles certificates, you may or may not be able to connect.
Example-B (never seen it in the wild but it would technically work fine)
Name on certificate:
AutoDiscover.Contoso.com
Split DNS Enabled=Yes (AutoDiscover.Contoso.com resolves to CAS both internally & externally)
Outlook Anywhere Internal & External Namespace=AutoDiscover.Contoso.com
OWA/EWS/OAB/ActiveSync Internal and/or External URL’s=AutoDiscover.Contoso.com
AutodiscoverServiceInternalUri=AutoDiscover.Contoso.com/AutoDiscover/AutoDiscover.xml
Of course the downside of this configuration is your users would have to use https://autodiscover.contoso.com/owa to access OWA & I haven’t found a customer yet who was willing to do that. However, all services would work, including Outlook/ActiveSync profile autoconfiguration.
I brought these examples up not to tell you how to deploy Exchange (by all means, get a multi-name or wildcard cert) but instead to explain that in the end, all that matters is that the names you configure in Exchange are resolvable to CAS & listed on the cert. You could literally make your Outlook Anywhere namespace “randomseriesofcharacters.contoso.com” & as long as it was on your cert & as long as the name resolved to CAS then it would work.
If you remember nothing else about certificates, just remember Do I trust the issuer of this certificate? Is the certificate expired? Is the name I’m using to connect to this service listed on the certificate?
Certificates-Miscellaneous
Certificates are bound to both the Default Web Site as well as the Exchange Back End site in IIS. If you right-click on Default Web Site>Edit Bindings>Select HTTPS & click Edit you can see the current certificate bound to the site. When you run “Enable-ExchangeCertificate –Thumbprint <Thumbprint> -Services IIS”, this is what it configures. The image below shows my certificate generated by my internal Certificate Authority:
I often see the incorrect certificate listed here or I may see certificates missing. Many customers mistakenly think that the Exchange tools are the only way to Import/Export certificates, but the Certificates MMC Snap-In is a very handy troubleshooting tool.
Start>Run>Type MMC & hit Enter>File>Add/Remove Snap-in>Certificates>Add>Select Computer Account>Next>Finish>Ok
Below is the Local Computer account’s Personal Certificates store; where manually installed certificates are likely to be stored. In short, when you run “Import-ExchangeCertificate” the certificate ends up here. So similarly you can use this console to Import/Export certificates as well.
Note: Your Personal store will likely look different than mine as my lab server is also a DC/CA.

Certificate issues have historically revolved around generating the request, but the Certificate Request GUI’s found in Exchange 2010 & 2013 have made those customer calls much easier.
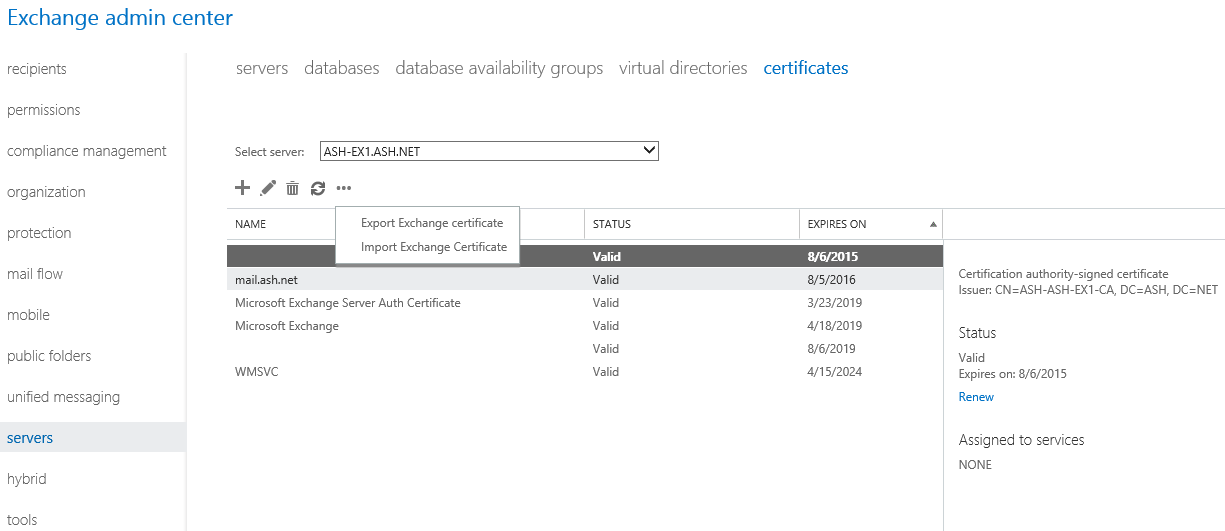
However, a problem I still see with customers is that don’t understand that when you generate the certificate request on the Exchange server, you need to leave that request intact until you receive the new certificate from your issuing Certificate Authority. If you don’t then your certificate will be missing the private key & be effectively useless. I see this frequently when customers are requesting a certificate multiple times or if they try to use a different server to import the cert on than the one they issued the request from. Once a request has been generated, you’ll see the pending request in the EAC Certificates console; along with an option to Complete the request when you’ve received the certificate from your CA (this process generates the Private Key).
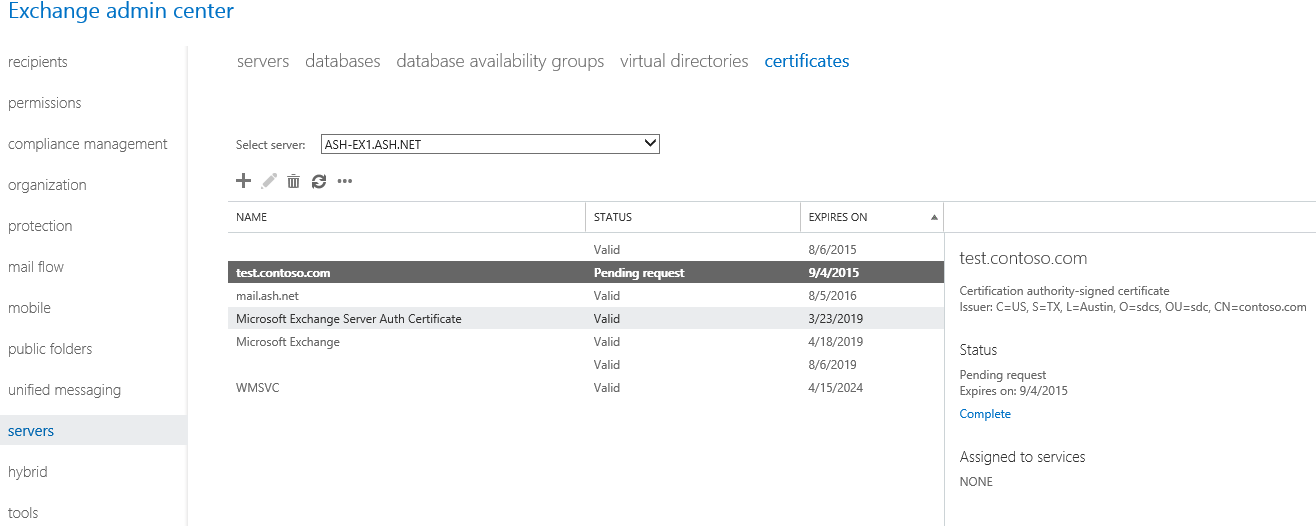
Additional Logging
Lastly, I can’t leave out the plethora of logging that’s now present in the install directory (typically C:\Program Files\Microsoft\Exchange Server\V15\Logging) of every Exchange Server. In fact, the logging is so vigorous that you’ll often find it taking up quite a bit of your disk space. Luckily there are methods to truncate unneeded logs. These logs have come in handy when I’ve had to troubleshoot odd issues in the past related to CAS proxy behavior. I’d suggest taking time to look through these logs using notepad or even better, Log Parser Studio. It’s a tool frequently used by Microsoft Support & great for when you have to parse through many log files trying to find a needle in a haystack.
Conclusion
As this post has already grown quite long, I suppose we’ll end it there. I’m sure I could find something to continue rambling on about but hopefully I’ve done this topic enough justice. If you make it to Dev Connections then I’d be happy to chat with you sometime during the conference about any other oddities that surround the world of troubleshooting Exchange.
Additional References
New-OWAVirtualDirectory
http://technet.microsoft.com/en-us/library/bb123752(v=exchg.150).aspx
Remove-OWAVirtualDirectory
http://technet.microsoft.com/en-us/library/aa998237(v=exchg.150).aspx
Default Settings for Exchange Virtual Directories
http://technet.microsoft.com/en-us/library/gg247612(v=exchg.150).aspx
Re-create OWA virtual Directories in Exchange 2013
http://exchangeonline.in/re-create-owa-virtual-directory-exchange-2013/
Virtual Directories: Exchange 2013
http://blogs.msdn.com/b/mvpawardprogram/archive/2013/03/18/virtual-directories-exchange-2013.aspx
How to Re-Create PowerShell Virtual Directory in a Single Exchange Server Environment
http://careexchange.in/how-to-re-create-powershell-virtual-directory-in-a-single-exchange-server-environment/
Managing Exchange 2013 IIS Virtual Directories & Web Applications
http://blogs.technet.com/b/get-exchangehelp/archive/2013/02/07/managing-exchange-2013-iis-virtual-directories-amp-web-applications.aspx
Troubleshooting Exchange 2010 Management Tools startup issues
http://blogs.technet.com/b/exchange/archive/2010/02/04/3409289.aspx
Useful CAS Reporting Script (Michael B Smith)
http://theessentialexchange.com/blogs/michael/archive/2014/09/09/reporting-on-client-access-server-configurations.aspx
Deploying & Configuring Server 2012 R2 Essentials with Office 365
Intro
This article will see us use Server 2012 R2 Essentials to integrate with Office 365 for Exchange. This will be one of the options I’ll discuss during my session titled “Exploring options for moving a small Exchange or Small Business Server environment to Office 365 or remaining on-premises” at Exchange Connections 2014 in Las Vegas Sept 15th-19th. It’s a long title for a session but it’s fitting considering the many options you’ll have for you or your customer’s business.
First we should know what Server 2012 R2 Essentials is. You could say it’s the spiritual successor to Small Business Server 2011, which was essentially (pun intended) discontinued. For a detailed walkthrough of Windows Server 2012 R2 Essentials, watch this great multi-part video series on it from Microsoft. It’ll answer all your licensing, deployment, & configuration questions.
History & Now
The last version of Small Business Server was SBS 2011. This was a Server 2008 R2 Domain Controller which ran Exchange 2010, along with WSUS, File Services, SharePoint Foundation, & SQL. The solution had several other cool features like Remote Web Workplace which was a web portal (running on top of Remote Desktop Services) that allowed any remote user to connect through a web interface & remote into a client machine on the company LAN. It also included a singular management interface named the SBS Console where Admins could manage Users, Groups, Mailboxes, Backups, Alerts, & Updates. This solution was aimed at small businesses (as the name implied) with less than 75 users.
Fast forward to today & we have Server 2012 R2 Essentials which has new features but also is a bit lighter. Exchange, SharePoint, & SQL are no longer included with the product; however you can still utilize these applications either on-premises (on another server) or in the cloud. The Windows Server Essentials Dashboard allows you to perform many of the same user management functions as the SBS Console, as well as manage mailboxes if you’ve chosen to run Exchange on another server on-premises or have connected your server to Office 365 (more on that later). New with 2012 R2 is the ability to install Essentials as a Server Role on Server 2012 R2 Standard or Datacenter; this is called the Windows Server Essentials Experience Role. See the aforementioned video series to learn about all the additional features of 2012 R2 Essentials.
Our Goal
In this article I’ll be Installing the Windows Server Essentials Experience Role, configuring the environment as if I were a small business, & connecting my environment to an Office 365 Tenant. I chose to use the server role (instead of a full Essentials OS install) in this guide for my own convenience. The experience should be the same, it’s really just the licensing that differs. Once we’ve performed these steps we’ll explore management of users; most notably, managing Office 365 mailboxes from the Essentials Dashboard. We’ll also see how passwords are synched to O365 (yes that’s right, Essentials had PasswordSync before the full version of DirSync did!).
Adding the Windows Server Essentials Experience Server Role
- Launch Server Manager, select Local Server, select Manage, & click Add Roles and Features.
- Proceed to the Select Server Roles page & place a checkmark next to Windows Server Essentials Experience. Take note of the additional Features that will be installed. Select Add Features & click Next a few times & then click Install. Reboot afterwards.

Exploring & Configuring Essentials
- Upon logging back into the server post-reboot, open Server Manager & click the flag in the top-right corner of the screen indicating post-deployment tasks requiring action. Click Configure Windows Server Essentials
- Take note of the initial page & click Next.
- As part of the Role configuration, your server will be made into a Domain Controller of a new Active Directory Domain (if you do not already have a domain). In this case I’ll put “ASH-Exchange Inc” for my Company Name (a fake Company Name I chose in hopes of not being sued 😉 ). I’ll also put “Ashdrewness” as the Internal Domain Name (I own ashdrewness.com; replace that domain in this guide with a domain you own). Click Next.
- When asked for an Administrator account I put “Andrew-Admin” & entered my preferred password twice. Click Configure. This next phase may take up to 30min, feel free to grab your favorite beverage. The server will eventually reboot.
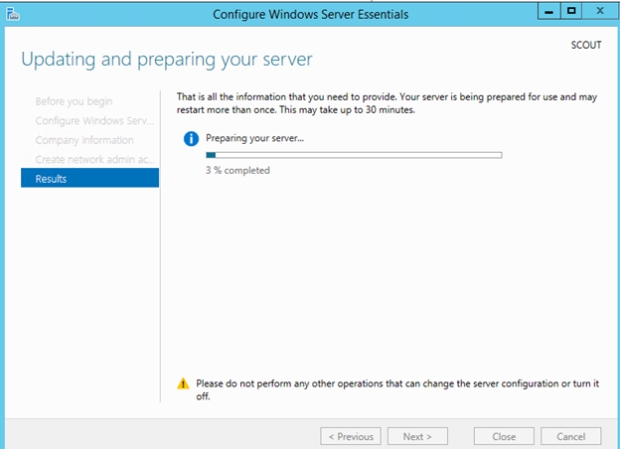
- After the server has rebooted you can log back in with the account you were using to perform the install/configuration (Administrator in my case) or the account you just created. After opening Server Manager you’ll be greeted with a dialog box saying the configuration is complete. Click Close.

- My server is now a Domain Controller for the Ashdrewness.local domain. From the Desktop, click the icon for the “Dashboard.” You’ll be greeted by the Essentials Dashboard.
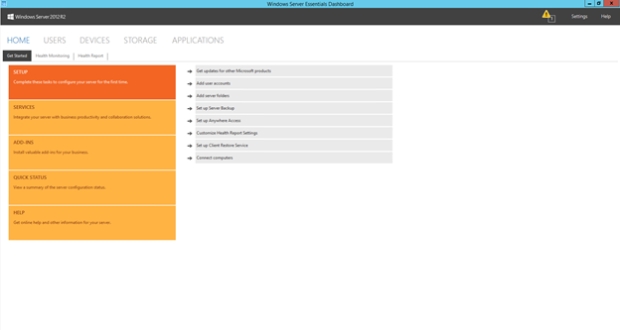
- I’ll go ahead & create some test user accounts by clicking on “Add user accounts” & then clicking “Click to add user accounts”.
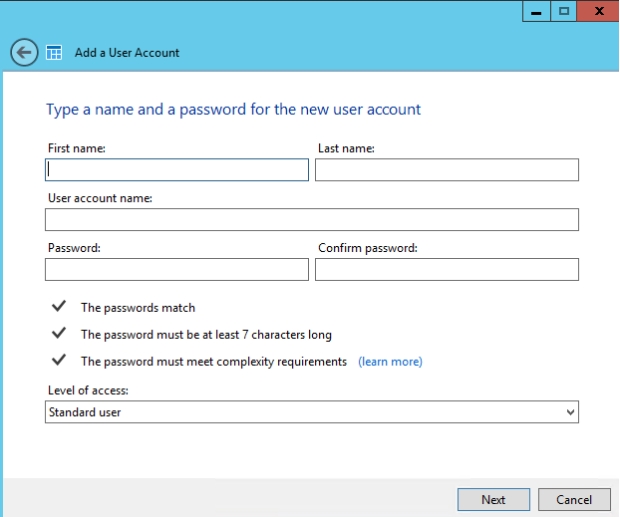
- Here I’ll create an account named John Smith with a “User account name” of JohnSmith. I’ll create a password, make the user a Standard user & click Next. On the shared folder screen click Next. On the Enable Anywhere Access screen click “Create account”. I’ll repeat this process for users Sally Smith & Mike Smith.


Configuring Office 365 Integration
- Now at this point there are many things I could setup on the server from within this wizard such as Backup, Anywhere Access, & adding computers to the domain; but for now I’ll just go straight to the “Services” section of the Dashboard.
- With “Services” selected, click “Integrate with Office 365.” Then click “Integrate with Office 365” again. This wizard will help us setup integration with an Office 365 tenant. You can either have a tenant already created or you can use the wizard to create one (or create a trial tenant). We’ll use the wizard to create our tenant now.

- Click Next & then click “Try” under “Microsoft Office 365 for midsize business and enterprises”. On the page it takes you to, input the requested information. On the next page I’ll create a username of “Andrew” & put “ashdrewnesstrial” as my company name. After creating a password click Next. You may be asked to provide a phone number for text message verification to prove that you’re not a bot. Afterwards click “Create my account.”
- Afterwards you’ll be given some information to write down, similar to :
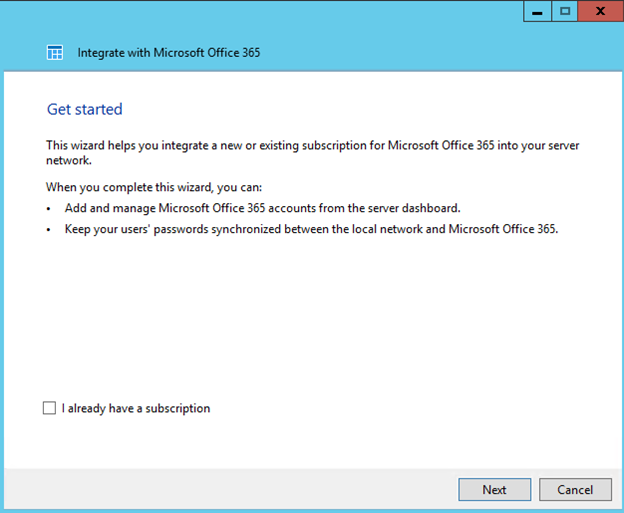
Office 365 sign-in page:
Your Office 365 user ID:
andrew@ashdrewnesstrial.onmicrosoft.com
- Click on “You’re ready to go” to be taken to the main dashboard of your Office 365 tenant. (Note: as time goes on, some of these O365 menu options may change so please use your best judgment to get through them. Also, If your browser crashes or you need to get back to the O365 Admin portal then just login to https://portal.office.com using the account you just created; andrew@ashdrewnesstrial.onmicrosoft.com in my case.)
- From the top of the Dashboard click Admin>Office 365. On the next page click “Domains”. Click “Add Domain”.
- I own “ashdrewness.com” so at this point I’ll add it to this Office 365 tenant (Note: a domain can only exist in one Office 365 tenant at a time). Use this wizard to add your domain. In my case the domain is hosted by GoDaddy so I’m prompted to have the Office 365 wizard confirm ownership for me by creating a randomly generated TXT record. I will be prompted for my GoDaddy credentials & the required records will be created for me. Click Finish when complete.
- At this point of the wizard I’ll be asked to add users & assign licenses. Click “Start step 2” & say “I don’t want to add users right now” & then Next.
- Click “Start step 3” & then click Next to say I wish to use this domain for Exchange & Lync Online.
- Now click “Setup records” to add the appropriate DNS records in your zone. Click Finish.
- [Back in Essentials] At this point, go back to the “Integrate with Microsoft Office 365” wizard in the Essentials Dashboard. If you’re still on the page where we left off then click Next.
- Enter the credentials for the Office 365 admin account we created; in my case this will be Andrew@ashdrewnesstrial.onmicrosoft.com. Click Next after entering the credentials.
- The next page will inform you that a strong password policy will be configured. Check the box & click Next (by doing this, users may be prompted to change their passwords).


- After completing the wizard & restarting the Dashboard, click on “Services” again to see that your Windows Azure Active Directory & Office 365 integrations are now Enabled.
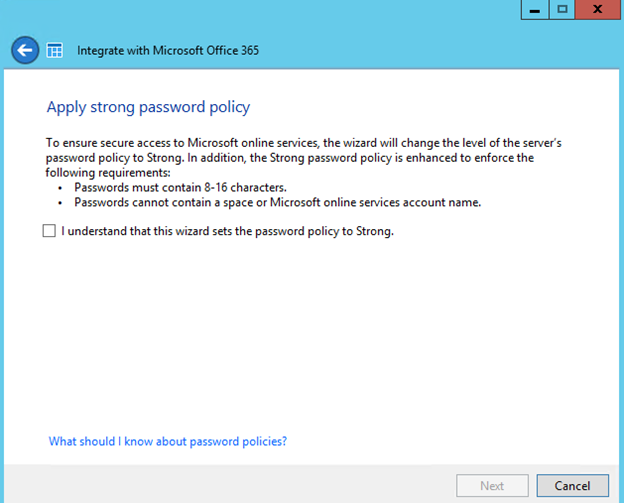
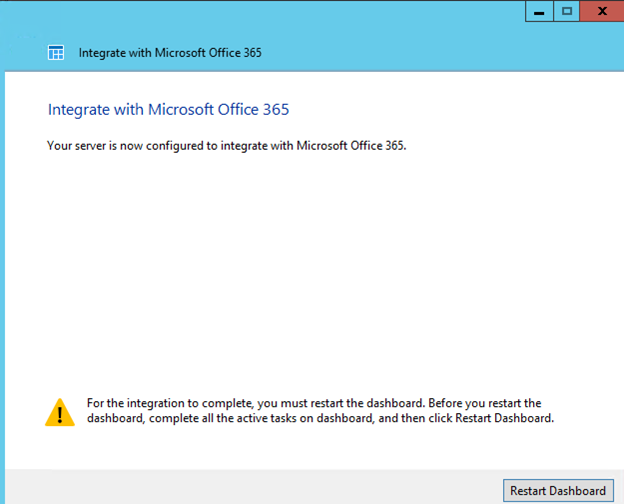
Matching your Active Directory Users with an Office 365 Mailbox
- Click on “Users” within the Essentials Dashboard & then select John Smith. In the right-hand pane click “Assign a Microsoft online account”

- On the first page of the wizard, leave the default selection of “Create a new Microsoft Online Services account & assign to this user account”. Click Next

- On the next page, at this time just select Exchange & Lync (while I’m sure all your users will be anxious to start using Yammer, they can be patient). Click Next.
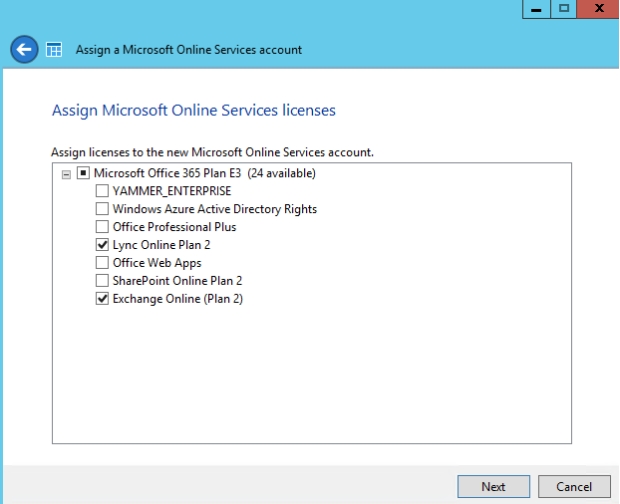
- The next page should provide verification that the account has been created & will also notify you that John Smith will be prompted to change his credentials the next time he signs in. Click Close.
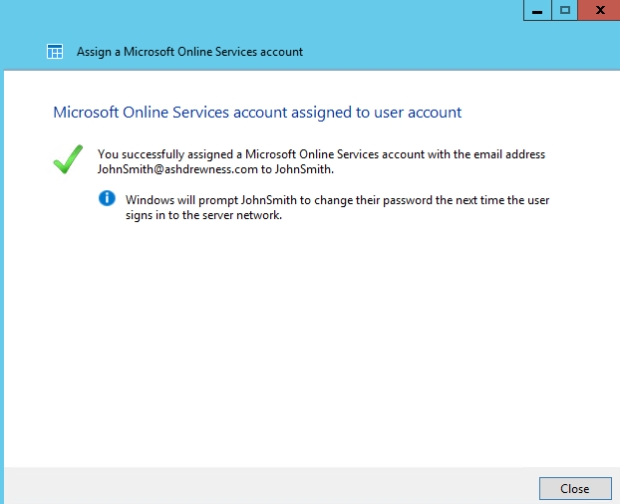
- At this point if I look at the user account of John Smith in Active Directory I can see that his User Principal name has been changed from JohnSmith@ashdrewness.local to JohnSmith@ashdrewness.com. Also, if I open the Office 365 Admin Center I’ll see that John Smith has been added to the tenant with a Status of “in cloud” which is different than it would show up if it were synched from my local Active Directory using DirSync. This is because Essentials does not use DirSync but its own custom framework for synching users to the cloud & keeping Passwords in sync (in fact, it could do Password Synchronization before DirSync could). Speaking of passwords…..
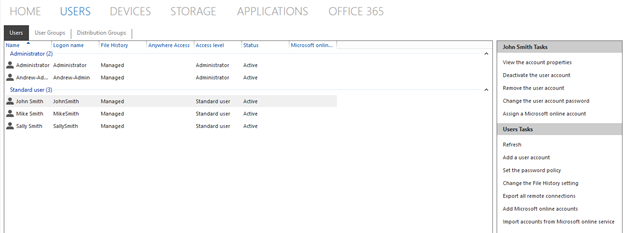
- Now if you were to try & login to the Office 365 portal right now as JohnSmith@Ashdrewness.com you would get a login error. What you must first do is either try to login to your local Active Directory environment, have it prompt you to change your credentials, change them to a password that meets your new complexity policy OR an admin could use the Essentials Dashboard or Active Directory Users & Computers to reset the password.
- Afterwards, connect to https://portal.office.com & login using JohnSmith@Ashdrewness.com with your new credentials. You’ll be presented with the below page. Note: In my testing, it is a matter of seconds between changing a password on-premises & having it take effect in the Office 365 tenant. This is much faster than DirSync; however using the Essentials Office 365 features (and its own custom web-based sync service) is only supported in a single Domain Controller environment, aka small environments (UPDATE: It is now supported in multi-DC environments per this article).
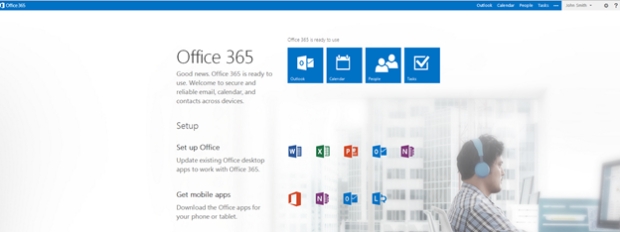

- You will now be able to use Office 365 features like Exchange Online.

Map an existing On-Premises user account to an existing Office 365 mailbox
We’ll now act as if we already have an Office 365 mailbox created & now we wish to map it to an on-prem AD user account. For instance, this would be the case if you had migrated from another version of Exchange to Office 365 using a Cutover Migration or similar.
- Login to the Office 365 admin portal with Andrew@ashdrewnesstrial.onmicrosoft.com & navigate to “Users and groups”. Click the plus symbol to create a new user called “Mike Smith” with a user name of “MikeSmith”.
- Now back in the Essentials Dashboard, select Mike Smith & then click “Assign a Microsoft online account.”
- This time select “Assign an existing Microsoft Online Services account to this user’s account”. Notice how a drop-down will appear which will automatically populate with your tenant accounts which have yet to be mapped to an on-prem user account. Select MikeSmith@ashdrewness.com & click Next.

Managing your Office 365 properties from the Essentials Dashboard
- From the Users pane of the Essentials Dashboard, double-click John Smith’s user account. On the Properties of John’s account, click the “Microsoft online” tab. Notice it’ll take a second to connect.
- Notice you can do things like block access to the service, add additional email addresses, & assign/un-assign services to the account. Close out of the Properties of John’s account.
- Within the Users pane of the Essentials Dashboard, click the Distribution Groups tab & then click “Add a distribution group”.
- Create a group called “TestDG” & give it an email address of TestDB@ashdrewness.com & click Next.
- Add Mike & Sally to TestDG & click Next. The group will be created in your Office 365 tenant.
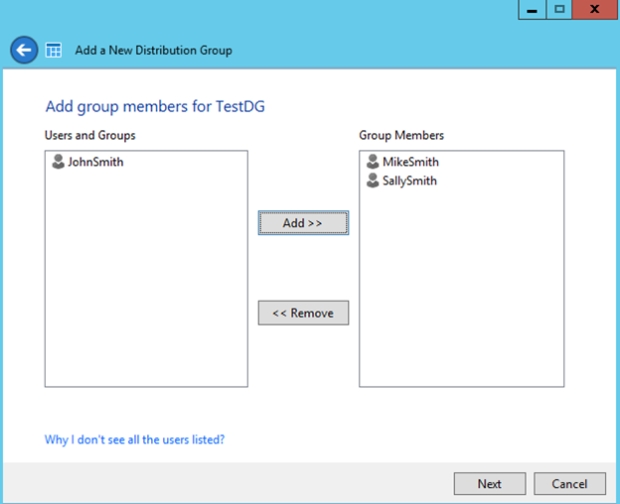
- If you login to your tenant you will now see that the group has been added with the users you selected as members.
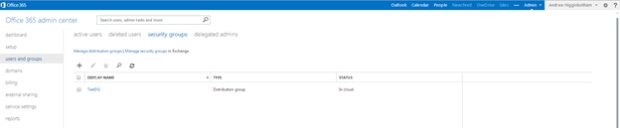
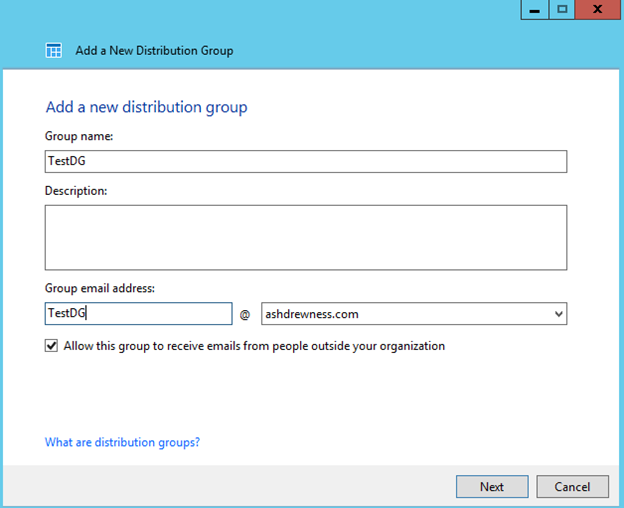


Summary
Hopefully this gives you an idea of what’s possible with Server 2012 R2 Essentials & can be looked at as a viable option for you or your customers.
Again, I’ll be speaking at Exchange Connections 2014 in Las Vegas Sept 15th-19th on the topic of small businesses & Office 365, as well as Exchange troubleshooting. I hope to see you there!
Edit: The Office 365 Integration features are now supported in multiple Domain Controller environments. It now appears that the only limit is the 100 user supported limit mentioned in this article
Unwanted Email Generated with Folder Assistant & Modern Public Folders
Scenario
This issue came to me via a forum I moderate.
This company has Exchange 2013 installed & are using Modern Public Folders. They have a business process where customers email a mail-enabled public folder & have setup a rule (using the Folder Assistant) to fire once the email has been received. This rule sends an email to the customer essentially saying “Thank you for your email, we will get back to you shortly”.
Employees then use the message Categorization feature to assign a Category to the email so it can then be tracked accordingly. Unfortunately, once the message is marked with any category, the rule fires again & sends another email saying “Thank you for your email, we will get back to you shortly” to the customer. Say for instance the categorization is changed 3 times, then the customer would receive 3 additional emails (quite SPAMMY). Issue happens when using Outlook (tried both 2010 & 2013) as well as OWA.
This environment recently moved from Legacy Public Folders (03/07/10) where this issue did not occur with the same configuration. I was also able to reproduce this issue in my lab; I’ve detailed the process below:
Issue Reproduction
I duplicated the configuration in two different environments, one with Exchange 07/10/13 & Public Folders on Exchange 2007 (Legacy Public Folders) while the other environment was purely Exchange 2013 SP1 using Modern Public Folders. In either scenario the configuration was the same:
- Create a Public folder named “TestPF”, Mail-Enable it, & grant an account Owner permissions for it.
- Open Outlook as the Owner account & navigate to the TestPF public folder.
- Right-Click>Properties on TestPF. Click “Folder Assistant” & then click “Add Rule.”
- Click “Sent To” & choose the email address for your mail-enabled public folder (see image below).

- Select “Reply With” & then click “Template”. Within the Outlook window that opens, compose the template you wish to send out & then click “Save & Close” (see image below).

- Click “Ok” twice.

- Now compose an example customer email to be sent to the public folder’s address

- You should then receive an email from the public folder’s SMTP address containing the text you placed into the template earlier.

- Now navigate to the TestPF public folder. On the newly received customer email, right-click, hover over Categorize, & select a Category (see image below).

10. Shortly after assigning a Category you (the customer in this case) should receive an identical template email which the Folder Assistant fired off again.
If you perform these same steps on a Legacy Public Folder, the issue should not occur (no duplicate emails after changing the Category).
Workaround
I initially tried sending this to some internal Microsoft people via the Ranger & MVP DLs but never received a response. It seems like one of those odd corner cases that would be hard to get traction on. I suggested opening a MS Support case to attempt to get it classified as a bug. Unfortunately not everyone has a Premier Support contract & given there’s no guarantee of MS agreeing something is a bug (thus refunding their money) the company was hesitant to create the case & invest the time. This decision was made after they determined that a workaround for this issue was to create a subfolder called “Received” (which did not have any Rules configured) & move the emails there before applying any message Categorization.
Note: An important concept to understand is that every bug that needs to be fixed is a business decision. It takes extensive development as well as testing/validation effort to make it happen. So knowing that, it is almost always necessary to write out not only the problem description but also a business case for why a certain behavior is negatively impacting your business. It may seem a bit tedious but this is the type of ammunition needed by Support to get traction on an issue with any development team at Microsoft.
Conclusion
This is certainly an odd issue but I wanted to put it out there in the event someone used a similar process & were either currently having issues or were planning the move to 2013 Modern Public Folders.

